How My First Spring Garden Failed (And How You Can Fix Yours)
I still remember my very first attempt at starting tomato seeds on a chilly February morning. I dumped regular backyard dirt into old plastic cups, poked seeds into the muck, and placed them on my sunny windowsill.
My heart swelled with pride when tiny green stems popped up a few days later. I thought I was already a master gardener ready for a huge spring harvest.
Two weeks later, my grand garden dream turned into a sad nightmare. Those tiny shoots grew incredibly tall, turned pale yellow, and collapsed into a soggy mess overnight.
I sat at my kitchen table looking at a tray of dead seedlings, feeling totally defeated and embarrassed. I had spent money on seeds, wasted hours watching them, and ended up with absolutely nothing to plant.
That kind of failure hurts more than most people admit. When you watch your hard work turn to dust before spring even arrives, you start doubting your abilities.
You ask yourself if you simply lack a green thumb. Buying full-grown plants at the nursery seems like the only option, even though it costs ten times more money and limits your variety options.
The truth is, starting seeds inside your house is not about luck or magical talent. It comes down to understanding a few basic physical rules that seeds need to thrive.
Once I threw out my bad habits and followed a clear routine, everything changed completely. My weak, skinny sprouts turned into thick, dark green plants that produced baskets of sweet tomatoes all summer long.
If you have ever stared at a tray of weak, dying sprouts in frustration, I want you to know you are not alone. You do not need expensive equipment or a greenhouse to get incredible results.
Let us walk through the honest steps together so you can grow strong, healthy vegetable seedlings in your own living space this year.

Why Indoor Seed Starting Changes Everything for Spring Gardens
Starting your own vegetables inside your house gives you complete control over your growing season. You are no longer stuck with the four basic tomato varieties sold at your local big-box store.
Instead, you can choose from thousands of unique heirloom crops with amazing flavors, strange colors, and high disease resistance.
Feature Store-Bought Transplants Home Seed Starting Plant Variety Options Very Limited (3-5 common types) Massive (Thousands of options) Average Cost Per Plant High ($4.00 - $6.00 per pot) Very Low ($0.10 - $0.25 per seed) Root Quality Often root-bound or stressed Fresh, strong, and undisturbed Planting Timing Depends on store stock timing Perfect timing for your climate
Growing from seed saves a huge amount of money over time. Single plant starts at nurseries cost four to six dollars each nowadays.
A single seed packet costs less than that and contains dozens or hundreds of seeds that remain viable for years when stored correctly.
Most importantly, indoor starting gives your garden a huge head start before the warm spring weather arrives. By the time the last winter frost passes, your plants are already several inches tall and ready to blast off.
This leads to much earlier harvests and a longer season to enjoy fresh vegetables right from your yard.
Gathering Your Essential Indoor Seed Starting Gear
You do not need to spend hundreds of dollars to build a great indoor setup. However, using the right basic materials will save you from the painful mistakes I made during my first year.
1. Seed Starting Mix vs. Regular Garden Soil
Never use soil straight from your yard or heavy outdoor potting dirt for tiny seeds. Outdoor soil is far too dense, drains poorly in containers, and harbors fungal spores that destroy young roots.
Always select a light, sterile seed starting mix. These mixes usually contain peat moss or coconut coir mixed with perlite and vermiculite.
This combination holds moisture like a sponge while allowing plenty of oxygen to reach young root systems. Seedlings need oxygen just as much as they need water to build strong cell walls.
2. Choosing the Right Containers
You can use standard plastic cell trays, soil blocks, small peat pots, or recycled plastic containers. If you use recycled food tubs, simply wash them thoroughly and drill several drainage holes in the bottom.
Water must drain out freely so roots do not sit in stagnant moisture.
Cell trays with removable inserts are very convenient for beginners. They allow you to pop individual plants out smoothly without disturbing delicate root structures when transplanting time arrives.
3. Humidity Domes and Trays
A simple clear plastic cover or clear plastic wrap works wonders during the early germination phase. It traps ambient humidity and heat inside the tray, creating a tropical microclimate that triggers seeds to sprout faster.
Once seeds sprout through the surface, you must remove this cover immediately to allow air circulation.
Knowing Exactly When to Plant Seeds Indoors
Timing is everything when it comes to indoor seed germination. Planting your seeds too early results in giant, overgrown plants that outgrow their pots before outdoor weather warms up.
Planting too late leaves you with tiny plants that struggle to establish themselves under the hot summer sun.
Vegetable Family Weeks Before Last Spring FrostI deal Germination Soil Temp Onions & Leeks10 - 12 Weeks65°F - 75°F (18°C - 24°C) Peppers & Eggplants8 - 10 Weeks80°F - 90°F (26°C - 32°C) Tomatoes & Broccoli6 - 8 Weeks70°F - 80°F (21°C - 27°C) Squash & Cucumbers3 - 4 Weeks75°F - 85°F (24°C - 29°C)
First, find the average last spring frost date for your local area through an online search or local agriculture office. Mark that exact date on your wall calendar.
Look at the back of your seed packet to find the suggested indoor starting timeline, which is usually listed as a range of weeks before that frost date.
Count backward on your calendar from your last frost date by that exact number of weeks. That specific calendar week is your target window for pressing seeds into the soil.
The Step-by-Step Seed Sowing Guide
Now that your gear is ready and your calendar is marked, it is time for the fun part. Sowing seeds correctly takes just a few calm minutes per tray.
STEP 1: Pre-moisten your lightweight seed starting mix with warm water.
STEP 2: Fill cell trays firmly, tapping to remove hidden air pockets.
STEP 3: Drop 2 seeds per cell at a depth equal to double seed width.
STEP 4: Cover seeds lightly, mist surface, and apply humidity dome.
Pre-Moisten Your Soil Mix
Never fill your trays with bone-dry soil and try to water it afterward. Dry peat moss actually repels water, causing it to run off the surface without soaking in.
Dump your seed starting mix into a bucket, add warm water, and mix it thoroughly with your hands.
The soil should feel like a wrung-out sponge. When you squeeze a handful, a few drops of water should come out, but not a running stream.
Fill Your Trays and Sow
Scoop your damp soil mix into the container cells. Tap the tray gently on your table to help the soil settle evenly, but do not compress it down firmly with your fingers.
Keep the texture light and airy so tiny tender roots can push through easily.
As a general rule, plant seeds at a depth equal to roughly two times their width. Tiny seeds like lettuce or tomatoes need only a light dust cover of soil, while larger seeds like squash require a deeper hole.
Drop two seeds into each cell to ensure good germination rates. If both grow, you can easily snip the weaker sprout off at soil level later.
Pro Tip: Early on, I made the huge mistake of watering my freshly sown seed trays from the top with a heavy watering can. The strong blast of water washed tiny seeds down into the deep corners of the trays where they rotted in the dark. Now, I always bottom-water by pouring half an inch of water into the solid bottom tray. The soil slowly pulls moisture upward like a lamp wick without disturbing a single seed.
Lighting, Heat, and Airflow Management
This is where most home gardeners run into serious trouble. Providing proper light and warmth turns weak sprouts into tough, stocky plants.
Why Windowsills Are Not Enough
A sunny south-facing window seems like the natural spot for plants, but winter and early spring sunlight is simply not bright enough. The sun sits low on the horizon, and window glass filters out helpful light spectrums.
Seedlings grown on windowsills stretch towards the light, becoming skinny, pale, and top-heavy. These are called "leggy" seedlings, and they rarely survive outdoor garden conditions.
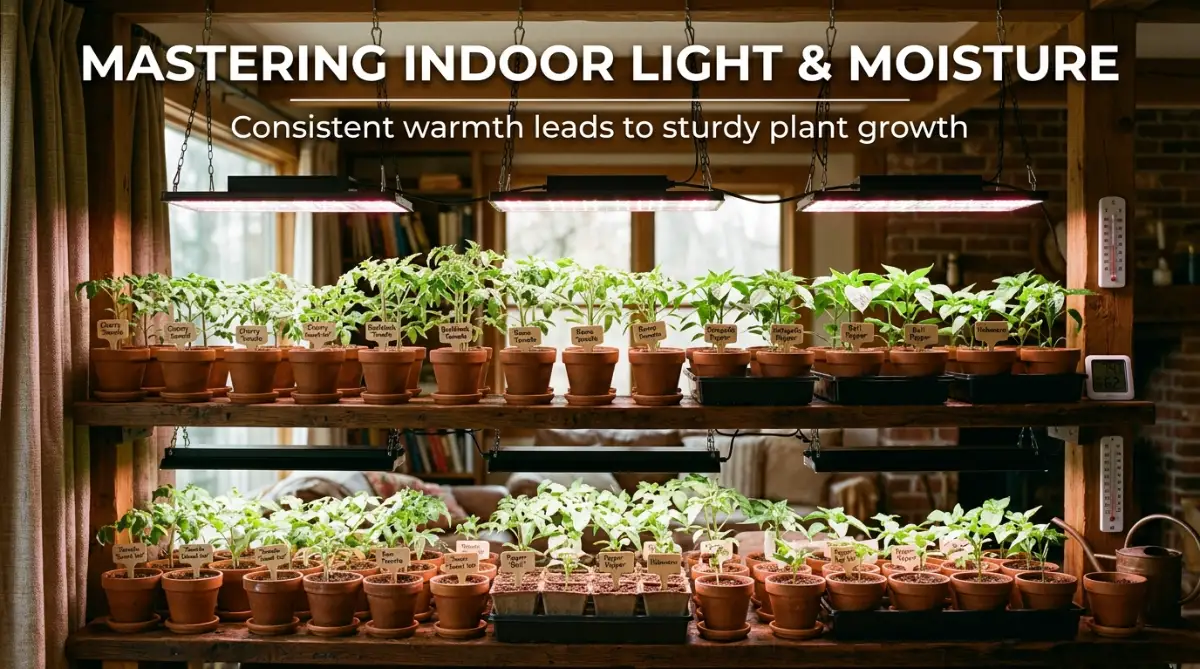
Position electric grow lights two to three inches directly above the tops of your seedlings. Keep the lights turned on for 14 to 16 hours every day using an inexpensive outlet timer.
As your plants grow taller, adjust the light height to maintain that crucial two-inch gap.
Watching a short visual demonstration of indoor setup steps can make your seed starting process much smoother and easier.
If you want to see how I personally set up my indoor seed trays, grow lights, and potting mix step-by-step, I highly recommend watching this comprehensive video guide:
Watch the Video: A Complete 20 Minute Guide to Starting Tomatoes & Peppers Indoors by Gary Pilarchik
Temperature Needs for Quick Germination
Most vegetable seeds germinate best in soil temperatures between 70°F and 85°F. Your room air temperature might feel comfortable to you, but damp soil is often 5 degrees cooler due to evaporation.
Placing a electric seedling heat mat under your seed trays speeds up germination dramatically.
Peppers, eggplants, and tomatoes sprout much faster with steady bottom heat. Once the seeds sprout through the soil surface, turn off the heat mat and keep room temperatures around 65°F to 70°F for optimal top growth.
Using a Gentle Breeze for Strong Stems
Outdoor plants grow strong stems because the natural wind pulls and tugs on them, signaling the plant to produce thick support cells. Indoors, calm air allows stems to grow weak and thin.
Set up a small clip-on desk fan near your seedling shelf on low speed. Let the gentle breeze wave across the plants for a few hours each day.
This simple movement stimulates sturdy cell structures, building thick stems that stand up against real outdoor storms later.
Myth vs. Reality in Seed Starting
There are many common misconceptions circulating in online gardening groups that cause unnecessary crop losses.
- Myth: Seedlings need fertilizer as soon as they sprout through the dirt.
- Reality: Seeds contain all the built-in food energy needed to produce their first set of false leaves (cotyledons). Applying heavy fertilizer early burns sensitive new roots. Wait until the plant develops its second set of true leaves before feeding a very weak, diluted fertilizer solution.
- Myth: You must water your seedlings every single day on a strict schedule.
- Reality: Daily watering often leads to root rot and fungus problems. Water only when the top layer of soil looks pale brown and feels dry to the touch.
- Myth: Eggshells make the best natural seed starting pots.
- Reality: Eggshells are tiny, hold almost no moisture, and do not break down fast enough for growing roots. They dry out within hours, often killing delicate sprouts. Use proper cell trays instead.
Troubleshooting Common Seedling Problems
Even experienced gardeners run into occasional hiccups during the early spring indoor growing phase. Quick action saves your tray from total loss.
Problem Symptom Likely Cause Immediate Action Steps Stems flop and collapse Damping-Off fungal disease Reduce water, add fan for air flow Tall, skinny, pale stems Not enough bright overhead light Lower grow light to 2 inches away Yellow lower leaves Overwatering or nitrogen lacking Let soil dry; give light liquid feed Tiny flying black insects Fungus gnats in damp topsoil Let top soil dry out; use sticky pads
Damping-Off Disease
If healthy-looking seedlings suddenly collapse at the soil line with thin pinched stems, you are dealing with damping-off disease. This fungal issue thrives in soggy, cold soil with poor air circulation.
To prevent it, never overwater your trays, keep air moving with a fan, and always use clean, sterile seed starting mix.
Fungus Gnats
Tiny dark flies buzzing around your seed trays indicate your soil mix is staying too wet. Fungus gnat larvae live in damp topsoil and feed on tiny root hairs.
Allow the top quarter-inch of soil to dry out between waterings. Placing yellow sticky traps near the trays will quickly catch adult gnats.
Hardening Off: Preparing Seedlings for the Outdoors
You cannot take soft seedlings from a cozy indoor environment and plant them directly into outdoor garden soil. The bright unfiltered sun, blowing wind, and shifting temperatures will scorch their leaves and send them into severe shock.
Hardening off is the gradual process of getting your indoor plants used to real outdoor weather over 7 to 10 days.
Day 1-2 : 1 Hour in shaded, warm, wind-protected outdoor spot.
Day 3-4 : 2-3 Hours with gentle morning sunlight exposure.
Day 5-6 : 4-5 Hours including partial direct midday sun.
Day 7-8 : Full daylight exposure; bring indoors before cold night.
Day 9-10: Out all day and night if temperatures remain safe.
Start about a week before your planned outdoor planting date. Place your trays outdoors in a shaded, warm location protected from strong wind for just one hour on the first day.
Bring them back inside under your lights afterward.
Add one hour of outdoor exposure each day, gradually moving the trays into partial direct morning light, then full afternoon sunshine. Keep a close eye on soil moisture, as outdoor sun and wind dry out small pots quickly.
By the end of the ten-day period, your plants will feature tough stems, thick dark green leaves, and resilient roots. They are now fully prepared to go into your garden beds, ready to give you a bountiful, healthy spring harvest!
Pro-Level Secrets for Stronger Seedlings and Higher Yields
Once you master the basic steps of seed starting, you can unlock simple techniques that take your indoor garden to an expert level. These hidden tricks keep your seedlings healthy, reduce plant stress, and prepare them for big harvests.
Advanced Technique How It Helps Young Seed lings Ideal Plant Types Soil Potting Up Encourages deep, strong stem roots Tomatoes, Eggplants, Peppers Seed Thinning (Snipping) Prevents root overcrowding Lettuce, Brassicas, Greens Foliar Feeding Delivers quick trace minerals Peppers, Squash, Tomatoes Mycorrhizal Inoculation Builds beneficial root fungi networks All vegetable seedlings
The Power of Potting Up Early
Many beginners leave their sprouts in tiny cell trays for far too long. As roots fill up the container, they begin circling the plastic walls.
This conditions the roots to stop growing outward, creating a stunted root ball that struggles when planted outside.
When you see tiny white roots poking through the bottom drainage holes, move your seedlings into larger pots. Gently move the small plant into a four-inch pot filled with fresh potting soil.
For tomato plants, bury the lower half of the stem in the soil. Tomatoes produce brand-new roots along buried stems, creating a massive root system that absorbs moisture easily.
According to research from the University of Minnesota Extension, maintaining proper root volume and space prevents transplants from suffering early root restriction.
Using Microbial Inoculants for Root Health
Soil is a living habitat filled with tiny organisms that protect plant roots. When you use sterile seed starting mix, you provide a clean space free of diseases, but it lacks helpful soil biology.
Adding mycorrhizal fungi powder to your soil mix creates a beneficial relationship with young roots.
These microscopic fungal strands attach to roots, acting like extended root fibers that absorb water and soil minerals. Plants grown with beneficial root microbes bounce back faster after outdoor transplanting and fight off bad soil fungi.
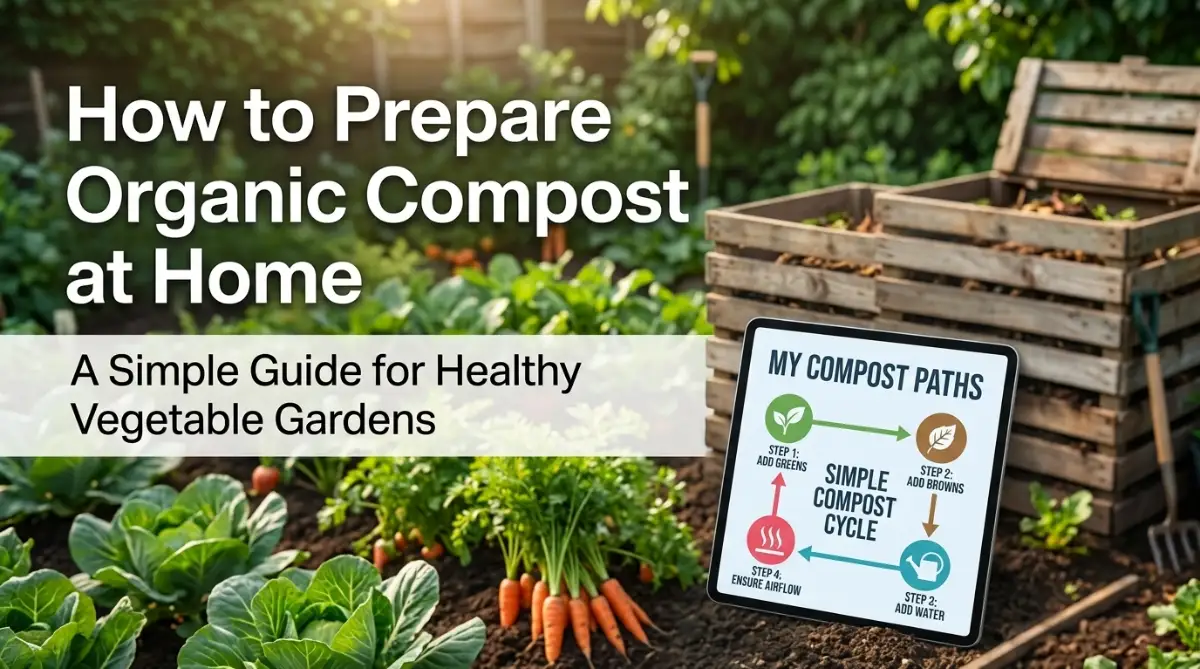
You can also prepare your future garden beds ahead of time by learning how to make rich organic compost at home for healthy vegetables. Adding finished organic compost to your potting soil mix provides gentle trace minerals without burning tender young stems.
Light Shifting and Photoperiod Tricks
Seedlings grown under continuous indoor light often become stressed because plants need a restful darkness period to process stored energy. Keep your grow lights active for 14 to 16 hours, then give your plants 8 hours of total darkness every night.
Position your lights directly over the center of your trays. Every two days, rotate your seedling trays 180 degrees.
This simple step ensures that seedlings on the edges receive balanced light exposure, preventing uneven bending across your shelves.
Always keep your grow light power cords elevated and away from standing drainage water on your plant shelves. Using a grounded power strip with built-in surge protection gives you total peace of mind when running lights and heat mats simultaneously. For a deeper dive on indoor lighting safety and proper plant placement, you can review this expert guide on indoor seed starting setup basics from Penn State Extension.
Gentle Thinning Without Root Damage
When two or three seeds sprout in a single cell, you must thin them down to a single strong plant. Never pull unwanted sprouts out by their roots, as pulling disrupts the delicate root ball of the neighbor plant you want to save.
Take a clean pair of small embroidery scissors and snip the unwanted seedling right at the soil surface. The clipped stem will naturally decompose, leaving the surrounding soil completely undisturbed for the strongest plant.
The Gentle Touch Strategy
In nature, wild plants experience wind, rain, and passing animals that touch their leaves every day. This tactile input signals the plant to release growth hormones that thicken stems and shorten height.
You can copy this natural process by running your open hand gently across the tops of your seedlings twice a day. This simple five-second habit creates strong, stocky stems that handle outdoor spring winds with ease.
Detailed guides from Penn State Extension highlight that physical stimulation helps stem tissue develop strength without relying on harsh chemical plant growth regulators.
Deadly Indoor Gardening Blunders That Ruin Your Spring Harvest
Starting seeds indoors should be a joyful experience, but small missteps can turn your efforts into a frustrating mess. Recognizing these common traps helps you save time, money, and emotional energy.
MISTAKE 1: Overwatering and leaving trays sitting in stagnant water.
MISTAKE 2: Leaving light fixtures far away from young plant tops.
MISTAKE 3: Using dirty, unsterilized old trays from previous seasons.
MISTAKE 4: Rushing seedlings outdoors without hardening them off first.
Loving Your Plants to Death with Excess Water
The biggest mistake new gardeners make is overwatering. It feels good to give your sprouts water every time you check on them, but roots need air just as much as water.
When soil stays soaked continuously, oxygen air pockets collapse completely. Roots suffocate in wet soil, turn brown, and rot away unseen.
The plant leaves turn yellow and drop off, leading many growers to add more water because they think the plant is thirsty. This creates a quick downward cycle that destroys entire trays of seedlings within days.
Always test your soil with your finger before grabbing your watering can. If the top layer feels damp, hold off on watering for another day.
Leaving Grow Lights Too High
Placing grow lights high up near the ceiling keeps them out of your way, but it starves your seedlings of light intensity. Light strength drops off rapidly the farther away the bulb sits from the plant surface.
When light sits two feet above seedling trays, tender shoots stretch frantically to reach the illumination. They grow long, thin stems that cannot support their own leaf weight.
These top-heavy plants flop over, snap under their own weight, or collapse during outdoor transplanting. Keep your light fixtures just two inches above plant tops at all times.
Reusing Unwashed Trays and Pots
It is great to reuse plastic trays from previous years to save money and cut down on plastic waste. However, planting fresh seeds into old dirty containers exposes young roots to fungal spores and pests left behind from past seasons.
Microscopic fungal spores cling to dried dirt inside plastic cell pots for months. When fresh moisture hits those old dirty surfaces, fungal growth explodes and attacks delicate new root systems.
Always scrub used trays in warm water mixed with a small amount of mild dish soap and white vinegar before adding fresh seed starting mix.
Rushing Transplants Outdoors Too Quickly
After tending your indoor plants for six weeks, you will feel excited to get them into your garden beds. Rushing your tender green seedlings straight into cold outdoor ground on a sunny spring afternoon causes severe plant shock.
Strong outdoor sunlight burns soft indoor leaves within hours, turning them white and crisp. Cold wind tears delicate stems, while sudden drops in soil temperature freeze sensitive roots.
Take the extra seven to ten days to hard off your plants slowly. Protecting them during this transition preserves your hard work and guarantees strong plant growth.
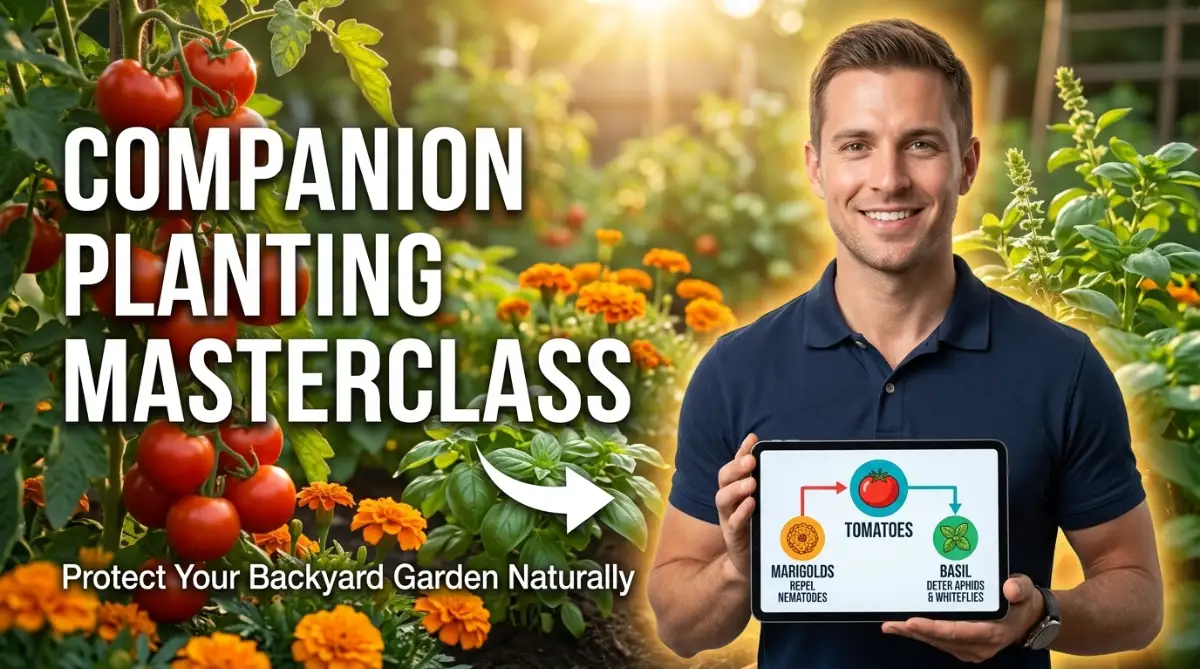
Once your plants are outdoors, you can protect your new crop from garden pests by discovering how to use companion planting to stop garden pests naturally. Planting pest-repelling herbs alongside your vegetable starts keeps destructive insects away without chemical sprays.
After moving your hardened-off transplants into garden beds, cover the surrounding soil with a two-inch layer of organic mulch like shredded leaves or clean straw. Mulching retains critical soil moisture, keeps root zones cool during summer heatwaves, and stops weed seeds from sprouting around your tender crops.
I also like to feed my young outdoor plants with a rich layer of homemade organic compost a few weeks after transplanting. If you want to boost your garden soil naturally without spending a dime, learn how to turn kitchen scraps into black gold with this USDA guide to organic composting at home.
Your Action Plan for a Bountiful Spring Harvest
Starting your vegetable seeds indoors is one of the most rewarding parts of home gardening. You take a tiny, dry seed, give it water, warmth, and light, and watch it transform into a productive food source.
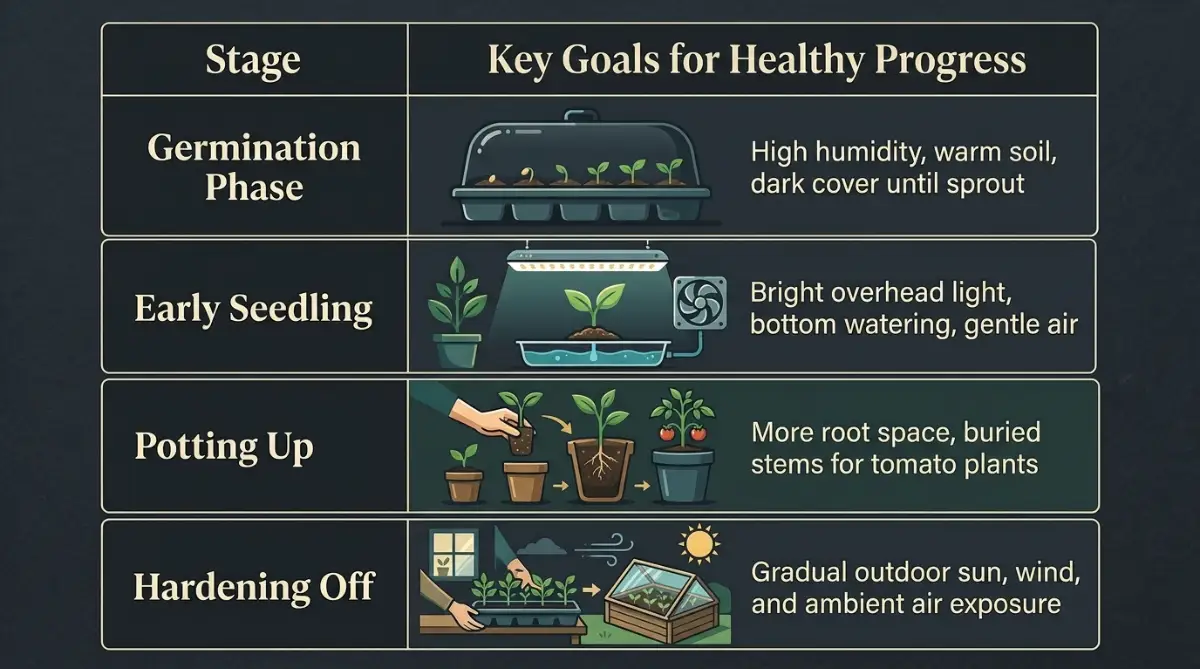
+-------------------+---------------------------------------------------+
| Stage             | Key Goal for Healthy Progress                     |
+-------------------+---------------------------------------------------+
| Germination Phase | High humidity, warm soil, dark cover until sprout  |
| Early Seedling    | Bright overhead light, bottom watering, gentle air |
| Potting Up        | More root space, buried stems for tomato plants   |
| Hardening Off     | Gradual outdoor sun, wind, and ambient air exposure|
+-------------------+---------------------------------------------------+
By choosing the right lightweight seed starting mix, keeping grow lights close, and watering carefully, you set your garden up for success. You no longer have to rely on nursery stock or limited store choices.
Remember that gardening is a journey of learning through observation and small adjustments. Every mistake teaches you something valuable that makes your next growing season even better.
Official planting resources from the Royal Horticultural Society show that early care and proper humidity management yield healthier vegetable plants throughout the entire growing season.
I want you to clear off a small table, grab a packet of your favorite vegetable seeds, and start your first tray today. My own gardening journey turned around completely once I committed to these simple steps, and yours will too.
You have all the knowledge you need to grow strong, beautiful seedlings that will fill your spring kitchen with fresh home-grown food!
Answers to Your Top Seed Starting Questions
Can I grow seeds indoors using standard fluorescent or LED shop lights?
Yes, standard cool-white LED or fluorescent shop lights work wonderfully for indoor seed germination. Look for bulbs labeled with a color rating of 5000K to 6500K, which matches natural daylight spectrums and promotes thick growth.
What should I do if white mold starts growing on my seed starting soil?
White surface mold forms when soil remains too damp and air circulation is low. Scrape off the surface mold, let the top layer of soil dry out between waterings, and place a small fan near your trays to increase airflow.
How do I know when my seedlings are ready to move into bigger pots?
Move seedlings to larger containers when their roots fill the small cell and begin poking out of the bottom drainage holes. Another clear sign is when the seedling grows twice as tall as the width of its individual container cell.
Can I place my seed trays directly over a heating radiator?
Avoid putting seed trays directly on radiators, as extreme heat cooks roots and dries out soil within hours. Use a regulated electric seedling heat mat made specifically for plant trays to keep soil temperatures warm and safe.
Do I need to soak seeds in water before planting them indoors?
Soaking large seeds with hard outer shells like peas, beans, or spinach in warm water overnight speeds up germination. Smaller seeds like tomatoes, lettuce, and carrots do not need pre-soaking and can go straight into damp potting mix.
How often should I water my indoor seedlings?
A: Water only when the top surface of the soil mix feels dry to the touch and the cell tray feels light when lifted. Avoid set calendar schedules, as moisture needs change depending on heat and plant size.
When should I start fertilizing my seedlings?
A: Start feeding when your seedlings show their first set of "true leaves"—the second set of leaves that appear after the initial sprouting leaves. Use a mild liquid organic fertilizer diluted to one-quarter strength once per week.
Disclaimer:
This blog post is provided strictly for educational and informational purposes to help home gardeners learn indoor seed starting techniques. Gardening results may vary depending on local weather conditions, climate zones, seed quality, and individual plant care routines. Always check local agricultural guidelines for plant varieties suitable for your specific location. This content abides by standard safety guidelines for home gardening and contains no commercial promotions or sponsored endorsements.