Annoying Drip-Drip-Drip Sound Is Costing You More Than Sleep
It's midnight. You're trying to fall asleep. And there it is again — that soft hiss from the bathroom that just won't stop.
You get up. You check the toilet. Nothing looks wrong, but the water keeps running anyway.
This isn't just annoying. It's expensive. A toilet that runs all night can waste hundreds of gallons of water before morning arrives.
You start to wonder if you need to call a plumber. Then you think about the bill. A simple visit can cost eighty dollars or more, just for someone to look at one small rubber part.
So you put it off. The sound continues. Your water bill creeps up a little more each month. And every night, that same noise reminds you that something in your home isn't working right.
You're not alone in this. Almost every homeowner deals with a running toilet at some point, and most never figure out why.
Why So Many People Get This Repair Wrong
Most people don't fix this problem on the first try. Here's why:
- They guess instead of checking. Many people jiggle the handle and hope the problem goes away on its own.
- They watch confusing videos. Some online tutorials throw out technical terms without explaining what they actually mean.
- They buy the wrong parts. Hardware store shelves are full of toilet repair kits, and not every kit fits every toilet.
- They skip the diagnosis step. A running toilet can have three or four different causes, but most guides only cover one.
- They feel intimidated by the tank. Opening the toilet tank looks complicated, so many people give up before they even try.
- They mix up symptoms. A running toilet and a leaking toilet are not the same problem, but they often get treated the same way anyway.
This mix of guesswork and bad information means the same toilet keeps running for weeks, sometimes months, even after someone has "tried" to fix it.
The Hidden Cost to Your Peace of Mind
A running toilet doesn't just waste water. It chips away at something else too.
- You stop trusting small fixes. After one failed attempt, many people decide they're "just not handy" and stop trying anything themselves.
- You feel a low-level stress every day. That sound becomes background noise for arguments, work calls, and quiet evenings at home.
- You worry about the bill before it even arrives. Not knowing how much water you're wasting creates a quiet, ongoing kind of worry.
- You avoid letting guests use that bathroom. Some people feel embarrassed about a toilet that makes strange noises in front of visitors.
- You start to feel like your home is falling apart. One small unsolved problem can make a person feel like nothing in the house works right.
None of this is dramatic on its own. But added together, day after day, it wears a person down more than they expect.
What's Actually Happening Inside Your Tank
Here's the good news: a running toilet is one of the easiest plumbing problems to fix.
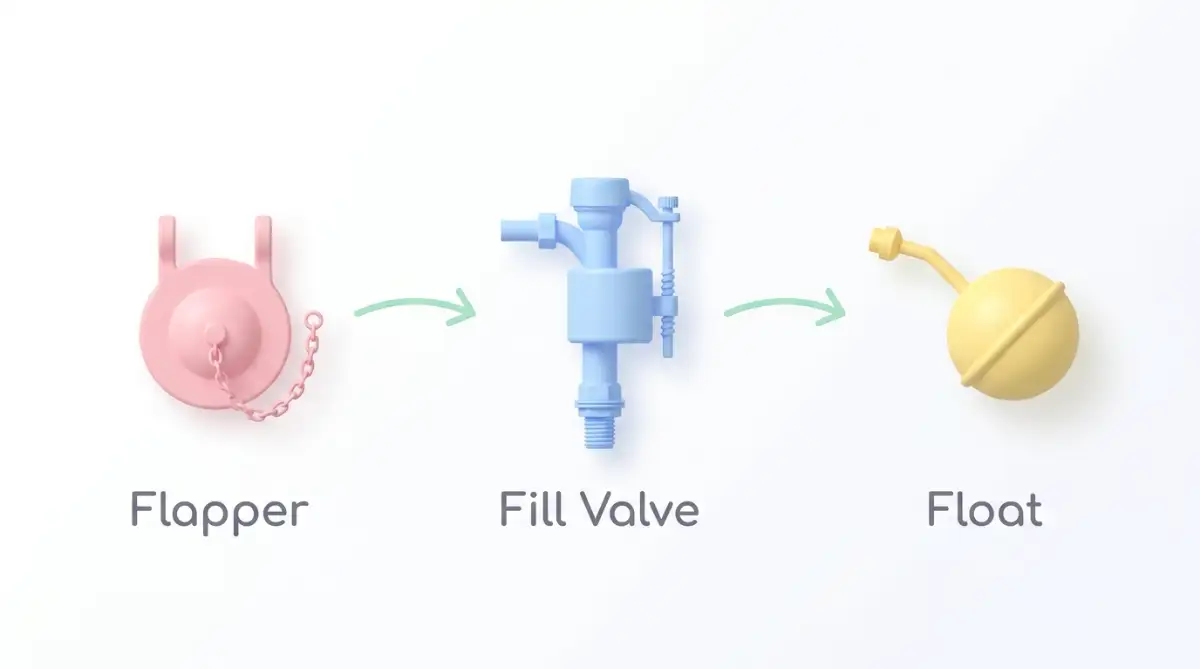
You don't need special tools. You don't need plumbing experience. You just need to understand three small parts working together.
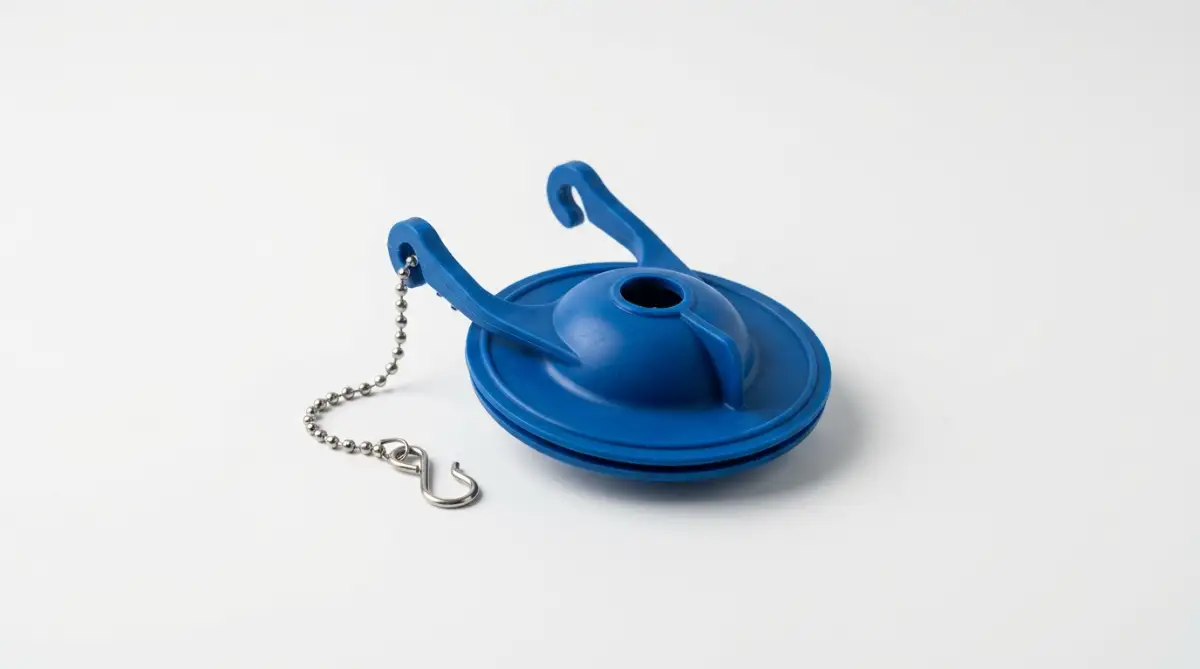
The flapper. This is a rubber or plastic piece at the bottom of the tank. It lifts open when you flush and should drop back down and seal tight right after. When it's old or warped, it doesn't seal properly, and water keeps leaking down into the bowl.
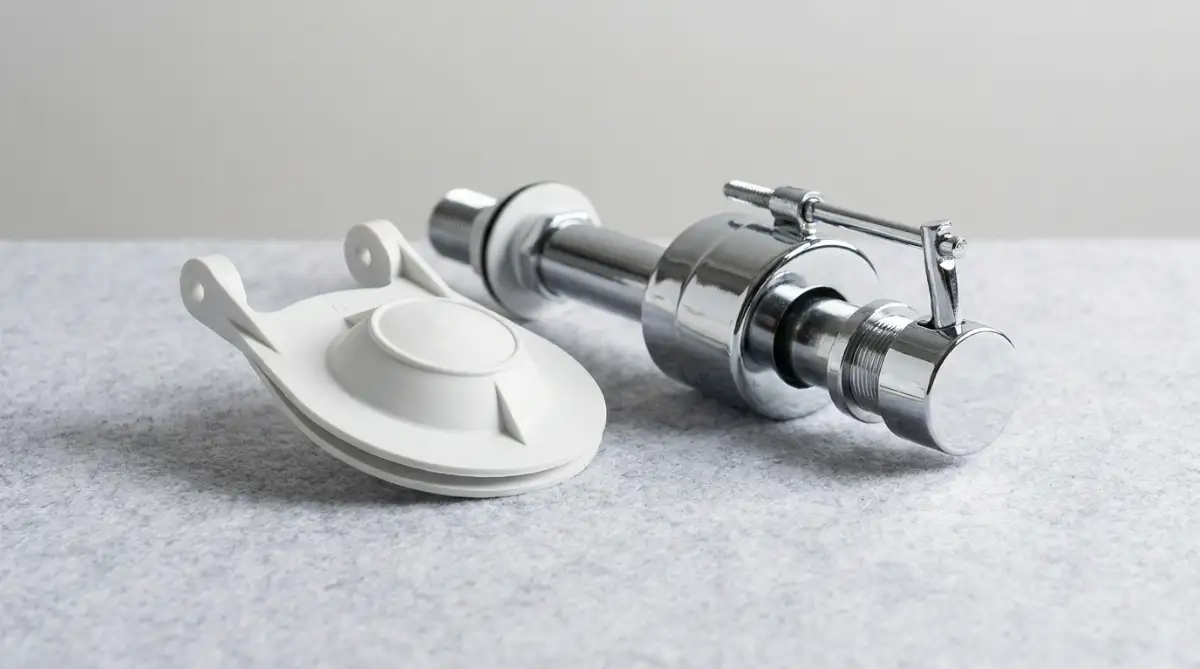
The fill valve. This part controls how much water fills the tank after each flush. If it's set too high, or if it's worn out, water keeps trickling into the overflow tube nonstop.
The float. This little ball or cup rises with the water level and tells the fill valve exactly when to shut off. If it's set wrong, the valve never gets the signal to stop filling.
Most running toilets have a problem with one of these three parts. That's really it. No mystery, no complicated system hiding underneath.
Think of your toilet tank like a tiny team with three workers. One opens and closes a door (the flapper). One controls how fast water flows in (the fill valve). One acts as a messenger that says "we're full" (the float). When one worker stops doing their job, the whole system falls out of sync, and you get that endless running sound.
You can check each one in under five minutes. Lift the tank lid, flush once, and watch what happens. You'll usually spot the problem just by watching how the water moves.
Once you know which part is causing the trouble, the fix itself is simple. That's exactly what we'll walk through next.

Step One: Find the Real Source of the Problem
Watch and Listen Before You Touch Anything
Before fixing anything, you need to know what's actually wrong. This takes about two minutes.
Take off the tank lid and set it somewhere safe, like on a folded towel. Flush the toilet and watch closely.
If the flapper doesn't fall flat after flushing, that's your answer. It might be stuck, warped, or sitting on a chain that's too short to let it close.
If water keeps trickling even after the tank looks full, check the fill valve and float next. Water may be running straight into the overflow tube without you noticing.
If you hear running water but the tank looks completely still, there could be a small leak around the flapper seal that's hard to spot at first glance.
A Simple Trick With Food Coloring
Here's a method plumbers actually use themselves. Add a few drops of food coloring to the tank water. Wait ten minutes without flushing.
If color shows up in the toilet bowl, your flapper is leaking. This one simple test saves you from replacing parts that were never broken in the first place.
Step Two: Fix or Replace the Flapper
When the Flapper Is the Problem
If your food coloring test showed color in the bowl, start here.
First, check the chain length. The chain connecting the flapper to the flush handle should have a little slack, but not too much. If it's pulled too tight, the flapper can never close all the way.
If the chain looks fine, look closely at the flapper itself. Over time, rubber flappers get stiff, warped, or coated in mineral buildup. A flapper that doesn't lay completely flat will never seal properly, no matter how many times you adjust the chain.
Replacing It Takes Less Time Than You Think
Here's the part that surprises most people: replacing a flapper takes about five minutes, start to finish.
- Turn off the water supply valve behind the toilet.
- Flush once to drain most of the water out of the tank.
- Unhook the old flapper from its mounting pegs.
- Attach the new flapper (bring the old one to the store, or measure it, so you buy the matching size).
- Reconnect the chain, leaving a little slack.
- Turn the water back on and test with one flush.
That's the whole repair. No glue, no special tools, and no waiting around for parts to "set" or cure.
Step Three: Adjust the Fill Valve and Float
When Water Keeps Trickling Into the Overflow Tube
If your flapper looked fine but water still runs, the fill valve or float usually just needs an adjustment, not a full replacement.
Look at the water level inside the tank. It should sit about one inch below the top of the overflow tube. If it sits higher than that, water spills into the tube nonstop, which makes the exact running sound you've been hearing.
How to Lower the Water Level
Most modern fill valves have a small clip or screw you can adjust by hand, with no tools needed.
- For a clip-style float: squeeze the clip and slide it down the rod a little.
- For a screw-style adjustment: turn the screw on top of the valve clockwise to lower the water level.
- For an older ball-float system: gently bend the metal arm downward so the ball sits a bit lower in the tank.
After adjusting, flush once and watch the water settle. It should stop right around that one-inch mark below the overflow tube.
If the valve still won't shut off fully after adjusting, the valve itself may be worn out on the inside. A replacement fill valve costs very little and installs in about ten minutes, using the same shut-off-and-drain process you used for the flapper.
A Few Things That Make This Repair Even Easier
You don't need a toolbox full of equipment for this job. Most people already have everything they need sitting in a closet.
- A towel to keep the bathroom floor dry while you work.
- A small bucket to catch leftover water from inside the tank.
- Gloves if you'd rather not touch tank water with bare hands.
- The toilet model number written down, just in case you do need to buy a specific part.
Keep these nearby before you start, and the whole repair turns into a smooth fifteen-minute task instead of a stressful guessing game.
Why This Quick Fix Matters More Than It Seems
A running toilet feels like a small annoyance, but it adds up fast. A toilet that runs constantly can waste enough water in a single month to noticeably raise a water bill.
Beyond the cost, there's something satisfying about fixing a problem in your own home with your own two hands. You don't need to wait around for an appointment. You don't need to clear your schedule so a stranger can come look at your bathroom.
You just need fifteen minutes, a little patience, and the right starting point.
Next time that sound starts up at midnight, you'll know exactly what to check, and exactly how to make it stop, for good.
The Habits That Keep a Toilet Quiet for Years, Not Just Days
Fixing the flapper or the fill valve solves the problem you can hear right now. But a few small habits keep that same problem from coming back.
Solve the Mystery of "Phantom Flushing"
Have you ever heard your toilet refill itself even though nobody used it? Plumbers call this phantom flushing, and it's one of the sneakiest signs of a slow leak.
Here's what's happening. The flapper lets out a tiny trickle of water all day long. The tank level drops just enough to trigger the fill valve, so it tops itself off on its own.
You never see a puddle. You never hear constant running. You just notice the tank refilling at random moments, almost like the toilet has a mind of its own.
The fix is the same flapper check from earlier, but this time, watch the tank over a longer stretch. Mark the water level with a pencil, walk away for an hour, and come back to see if it dropped.
If it dropped at all without anyone flushing, your flapper needs attention, even if the toilet seems silent most of the time.
Stop Mineral Buildup Before It Starts
Hard water leaves behind a thin, chalky film on every part inside your tank. Over months, this buildup collects along the flapper seal and around the fill valve.
That rough film stops the flapper from sitting flat. It also clogs tiny openings inside the fill valve, which can cause it to stick partway open.
You can prevent most of this with a five-minute cleaning routine every few months. Turn off the water, drain the tank, and wipe down the flapper seat with a soft cloth and a little white vinegar.
Avoid scrubbing with anything rough like steel wool. A soft sponge or old toothbrush works best for getting into the small grooves around the valve without scratching the rubber.
When the Handle Itself Is the Hidden Culprit
Sometimes the flapper and valve are both fine, but the toilet still runs after certain flushes. In that case, look at the flush handle and the lever arm connected to it inside the tank.
If the lever arm is bent, sticky, or doesn't spring back up on its own, it can hold the flapper open longer than it should, even after you let go of the handle.
Try this test: flush the toilet and watch the lever arm closely. It should snap back to its resting position within a second or two. If it hangs there, lifts unevenly, or feels stiff when you nudge it by hand, that arm needs a light cleaning or a replacement.
A new handle assembly is one of the cheapest parts in the entire toilet tank, and swapping it takes about the same five minutes as a flapper change.
Check the Overflow Tube for Cracks Too
Most people stop their inspection at the flapper and the fill valve. But the overflow tube, the open pipe standing in the middle of the tank, deserves a quick look too.
This tube carries excess water down into the bowl if the fill valve ever fails to shut off. A small crack near its base can leak water constantly, even when every other part is working perfectly.
Picture it like a chimney with a hole near the bottom. Smoke would still rise out of the top just fine, but a steady stream would also leak out of that crack the whole time, unnoticed unless you look closely.
Run your fingers gently along the base of the tube where it meets the tank floor. If you feel any roughness, a hairline crack, or notice water seeping from that spot specifically, the tube itself may need replacing along with the fill valve it's attached to.
Making the Fix Last for Years, Not Just Weeks
A repair only counts as a real fix if it holds up over time. Here's how plumbing professionals keep their own toilets quiet for years at a stretch.
Check your flapper twice a year. Rubber breaks down naturally, even with gentle use. A quick twice-a-year glance catches wear before it turns into a 2 a.m. running sound.
Skip the in-tank cleaning tablets. Those drop-in bleach tablets look convenient, but the chemicals inside them break down rubber flappers much faster than plain water ever would.
Watch your water bill for small jumps. A sudden, unexplained rise of even a few dollars can be your first clue that something inside the tank has started to leak again.
Keep a spare flapper on hand. They cost very little and take up almost no space under the sink. Having one ready means a future fix takes minutes instead of a special trip to the store.
Treat your toilet tank the same way you'd treat any small machine in your home. A little attention now saves a lot of frustration later.
Five Mistakes That Turn a Simple Fix Into a Bigger Problem
Most people don't ruin this repair on purpose. They just fall into a few common traps that make the job harder than it needs to be.
Mistake One: Using Bleach Tablets or Harsh Tank Cleaners
That blue or pink drop-in tablet might keep the bowl looking clean, but it's quietly destroying the rubber flapper with every flush.
The damage builds up slowly, so most people don't connect the dots until the flapper is already cracked and leaking. By then, they've usually replaced the part once already without knowing why it failed again so fast.
Mistake Two: Forcing Parts or Overtightening Connections
Plastic tank parts don't need much force to seal properly. Cranking down a nut or clip as hard as possible usually cracks the plastic instead of sealing it tighter.
A cracked fill valve or supply line connection can lead to actual water damage on your bathroom floor, which costs far more to fix than the part you were trying to tighten.
Mistake Three: Ignoring a "Small" Sound for Too Long
A faint hiss seems harmless at first. But that same small sound, left alone for months, can quietly waste thousands of gallons of water.
Waiting doesn't make the part heal itself. Rubber and plastic only get worse with time, never better, so a problem you ignore today is almost always a bigger job in three months.
Mistake Four: Buying a Flapper That Doesn't Match Your Toilet
Universal flappers look like they'll fit anything, but toilet tanks vary more than most people expect. A flapper that's slightly the wrong size or shape will never seal completely, no matter how carefully you install it.
This mistake sends people back to the store two or three times, convinced the "fix" isn't working, when really the part itself was wrong from the very first try.
A quick way to avoid this: take a clear photo of your old flapper next to a ruler before you throw it away, or simply bring it with you to the store. That one small step saves a second or third trip entirely.
Mistake Five: Skipping the Water Shut-Off Step
It's tempting to skip turning off the water supply valve, especially for a "quick" adjustment. This is the one mistake that turns a dry, simple job into a wet, stressful mess.
An open supply line during a repair can spray water across the bathroom in seconds. Always turn that valve clockwise until it stops before touching anything inside the tank.
Avoiding these five traps is often the real difference between a fix that lasts and one that sends you right back to square one. Most homeowners only need to learn this lesson once before it becomes second nature.
You Now Know More Than Most Homeowners Ever Will
Take a moment and notice how much ground you've covered. You can spot which part is failing just by watching and listening. You know how to test for a hidden leak with a simple kitchen ingredient. You can replace a flapper, adjust a fill valve, and catch small problems before they turn into expensive ones.
That's a real skill, not a lucky guess.
Most people live with a running toilet for weeks because the problem feels bigger than it actually is. You now know it almost never is.
The next time you hear that familiar hiss, you won't feel that same wave of stress. You'll grab a towel, lift the tank lid, and handle it yourself, calmly and quickly.
Think about how this same confidence can spread to other small jobs around your home. A wobbly cabinet hinge, a sticky door lock, a dripping faucet, none of these have to feel like emergencies that require outside help anymore.
Pick one thing from this guide and try it today, even if it's just the food coloring test. Small, simple actions like this are exactly how confident homeowners are made, one fixed toilet at a time.