The Ugly, Stained, and Crumbling Reality of Damaged Tile Grout
You step into your bathroom to enjoy a warm, relaxing shower after a long, tiring day. As you close the glass door, your eyes land directly on the dark, yellowed, and crumbling lines running between your wall tiles.
Instead of a clean, peaceful space, you are forced to look at ugly black mold spots and flaky white powder washing down your drain. No matter how much expensive shower gel you use, the bathroom always feels dirty, old, and completely unhygienic.
You try to ignore the crumbling spots, but deep down, you know that water is slowly seeping behind those broken seals. Every shower you take feels less like a comfort and more like a ticking clock waiting to cause expensive water damage.
Why Many Homeowners Face Costly Mistakes and Bad DIY Advice
When trying to fix dirty or damaged tile lines, many people use popular online methods that end up ruining their bathrooms. Rushing into a repair without the right materials can leave your tiles scratched and your walls rotting from the inside.
Here are the main reasons why common grout cleaning and repair methods often fail:
- Scrubbing with heavy steel wool: Homeowners often use metal scrubbers to remove stains, which permanently scratches the glossy protective glaze of the ceramic tiles.
- Applying raw chlorine bleach repeatedly: Heavy bleach kills mold temporarily but eats away at the cement base of the grout, causing it to crumble [15].
- Grouting over wet, active mold: Putting fresh grout over damp, black mold spots traps the moisture, causing the new grout to peel off within weeks.
- Using vinegar on cement-based grout: Acidic vinegar is a popular cleaner, but it reacts chemically with cement, weakening the grout structure and causing powdery erosion.
- Neglecting the water leak behind tiles: People often patch cracked grout without checking if the backing drywall is already soft and water-logged.
The Hidden Stress and Costly Consequences of Moldy Tile Joints
Ignoring dirty or cracked tile joints does more than just ruin the look of your bathroom; it can lead to massive household headaches.
- The constant fear of hidden rot: Knowing that water might be dripping behind your wall studs causes continuous worry about structural damage.
- Embarrassment when guests visit: You feel anxious every time a guest asks to use your bathroom, worrying they will judge your home based on the moldy grout.
- Respiratory health issues from mold spores: Damp, unsealed grout lines are the perfect home for black mold, which can trigger allergies and asthma attacks.
- The threat of loose tiles falling off: As water dissolves the thinset glue behind the tiles, whole wall tiles can suddenly loosen and fall, risking injury.
Fortunately, you do not need to spend thousands of dollars to hire a professional tile contractor. With a few safe ingredients and basic hand tools, you can restore your bathroom grout to its original beauty yourself.
The Practical DIY Roadmap to Pristine and Sealed Grout
To get a clean, long-lasting finish, you must approach your tile lines with a careful, step-by-step plan. Think of grout like the mortar between bricks; it needs a solid, clean, and dry foundation to stay strong.
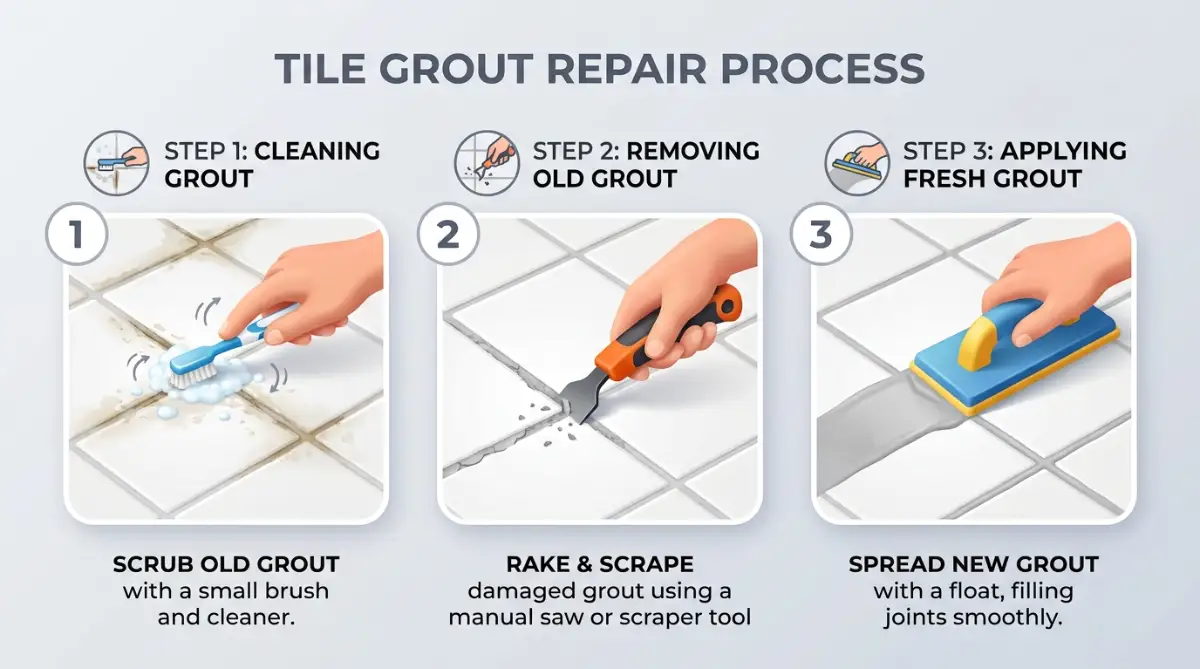
We will walk you through the first three essential steps to clean, remove, and replace your bathroom grout safely.
Step 1: Deep Cleaning Grout Lines Naturally (The Scrub Stage)
Before you decide to scrape out any grout, you should try to clean the stained areas first. Many dark spots are simply surface dirt and soap scum that can be lifted without replacing the material.
The Chemistry of the Oxygen Bubbling Paste
Instead of using harsh, smelly chemical sprays, you can create a powerful cleaning paste using baking soda and hydrogen peroxide.
Baking soda is a mild abrasive that scrapes away soap scum without scratching your delicate tile surfaces.
When you mix it with hydrogen peroxide, it creates an oxygen-rich bubbling reaction that lifts deep stains to the surface.
The Natural Grout Cleaning Mix:
------------------------------------------
2 Parts Baking Soda + 1 Part Hydrogen Peroxide + 1 Teaspoon Natural Dish Soap
------------------------------------------
This natural mix is completely odorless, safe for your skin, and will not weaken the cement base of your grout.
How to Apply and Scrub the Paste
Mix the ingredients in a small bowl until they form a thick paste with the consistency of wet sand.
Use an old toothbrush or a stiff-bristled grout brush to spread the paste directly along the dirty grout lines.
Grout Scrubbing Technique:
+---------------------------------------------------------------+
| Step | Action                                                 |
+---------------------------------------------------------------+
| 1    | Spread the baking soda paste evenly over the lines.    |
| 2    | Let it sit for 10 minutes to loosen the deep mold.     |
| 3    | Scrub in firm, circular motions along the joint.       |
| 4    | Rinse with warm water and dry with a microfiber cloth. |
+---------------------------------------------------------------+
Let the paste sit on the stains for about ten minutes to give the oxygen bubbles time to break down the mold.
Scrub the lines firmly using circular motions, focusing on the dark corners where mold loves to grow.
Rinse the wall with warm water and wipe it dry with a clean microfiber cloth to inspect your progress.
If the stains are gone but you still see deep cracks or holes, you are ready to move to the next step.
Step 2: Scraping Out the Loose, Damaged Grout (The Prep Stage)
If your grout is crumbling, flaking, or has deep holes, cleaning alone will not solve the problem.
You must remove the damaged material to create space for a fresh, new layer of grout to bond properly.
Choosing Your Removal Tool
For small bathrooms, a simple manual grout saw with a carbide-grit blade is the safest and most controllable tool.
If you have a very large area to clear, you can use an electric rotary tool with a specialized grout removal attachment.
Whichever tool you choose, the key is to work slowly and keep your hands steady to avoid chipping the edges of your ceramic tiles.
The Gentle Scraping Technique
Hold your manual grout saw flat against the joint line, making sure the blade is centered between the tiles.
Apply gentle pressure and slide the blade back and forth along the damaged grout line.
Grout Removal Depth Guide:
=======================================
[Tile Surface]
       |
[Empty Joint Space] <--- (Scrape down 1/8 inch deep)
       |
[Remaining Solid Grout] <--- (Provides a strong base)
=======================================
You do not need to remove all the grout down to the wallboard; you only need to clear out about one-eighth of an inch of depth.
This creates a deep channel that gives the new grout mixture plenty of surface area to cling to.
Use a shop vacuum with a brush attachment to suck out all the loose white dust and grit from the empty channels.
Wipe the joints with a damp sponge and let them dry completely before you start mixing your new batch.
Step 3: Mixing and Applying the Fresh Grout (The Seal Stage)
Now that your tile channels are clean, deep, and dry, you are ready to apply a fresh layer of grout.
This step requires the correct material choice to ensure your bathroom walls remain water-resistant for years.
Choosing Between Sanded and Unsanded Grout
Before buying a bag of grout, measure the width of the gaps between your tiles.
Grout Selection Rules:
+---------------------------------------------------------------+
| Joint Width  | Grout Type Recommended                         |
+---------------------------------------------------------------+
| Under 1/8"   | Unsanded Grout (Smooth, ideal for walls)       |
| Over 1/8"    | Sanded Grout (Strong, prevents shrinkage)      |
+---------------------------------------------------------------+
For standard bathroom wall tiles, the gaps are usually very narrow, so unsanded grout is your best option.
Unsanded grout is smooth, sticky, and fits easily into tight wall spaces without sliding out before it dries.
How to Mix and Spread the Grout
Pour a small amount of dry grout powder into a clean plastic bucket and slowly add small splashes of cool water.
Stir the mixture with a paint stick until it reaches a thick, smooth consistency similar to creamy peanut butter.
Let the mixed grout sit undisturbed in the bucket for ten minutes to allow the chemical dyes to activate, then stir it one last time.
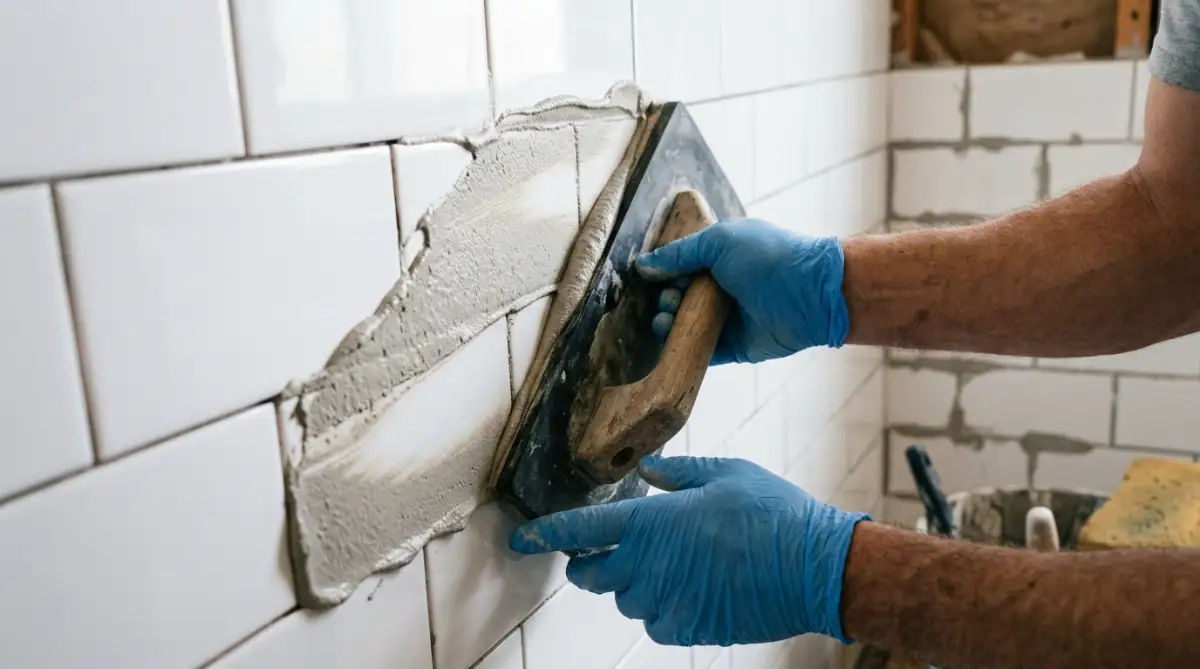
Scoop a generous amount of grout onto the edge of a rubber grout float.
Hold the float at a 45-degree angle against the wall and press the grout firmly into the empty tile channels.
Grout Float Application Angle:
------------------------------------------
Applying:     [ \ ] -> 45-Degree Angle (Forces grout deep into joint)
Scraping:     [ | ] -> 90-Degree Angle (Removes excess wet grout)
------------------------------------------
Move the float in diagonal directions across the joints, rather than straight along the lines.
Moving diagonally prevents the edge of the rubber float from dipping into the wet channels and scooping the grout back out.
Once the channels are filled, hold the float at a 90-degree angle and scrape off the excess wet grout from the face of the tiles.
Let the grout set for about twenty minutes until it feels firm to the touch, then use a damp, rounded sponge to gently wipe the tile faces clean.
By completing these three initial phases, you will have a beautiful, solid, and water-resistant barrier that protects your bathroom walls from daily moisture. Your tiles will look fresh and secure, and the ugly shadows of mold and rot will be completely gone.
Step 4: Removing Grout Haze and Shading the Joints
After your fresh grout has dried for a few hours, you will notice a thin, cloudy white film on the face of your tiles.
This film is called grout haze, and it is made of fine cement dust left behind during the sponging process.
Do not try to wash this haze off with a wet sponge, as this will only smear the wet cement dust back over the clean tiles.
How to Clear Grout Haze Safely:
=======================================
[Hazy Tile Face] ---> [Wait 3 Hours for Dryness] ---> [Buff with Dry Cheesecloth] ---> [Clean Tile]
=======================================
Wiping with a Dry Microfiber Cloth
Wait at least three to four hours until the grout inside the joints is completely hard and solid.
Take a clean, dry microfiber cloth or a piece of cheesecloth and buff the face of the tiles in quick, circular motions.
The dry cloth will easily polish away the cloudy haze, leaving your ceramic tiles looking bright and glossy.
Step 5: Applying a High-Quality Grout Sealer
Many homeowners think their job is finished once the tiles are wiped clean, but this is a critical mistake.
Cement-based grout is naturally porous, meaning it has thousands of microscopic holes that can absorb dirty shower water.
To keep your new lines looking clean and white, you must seal those pores with a penetrating grout sealer.
How Sealer Protects Your Bathroom:
------------------------------------------
Unsealed Grout ---> Absorbs Dirty Water ---> Mold Grows Deep Inside (Ruined!)
Sealed Grout   ---> Repels Water Droplets ---> Moisture Slides Down (Safe!)
------------------------------------------
How to Seal Your New Grout
Wait at least forty-eight hours after grouting to ensure all the internal moisture has fully evaporated from the joints.
Use a small foam brush or a specialized roller applicator to paint the liquid sealer directly onto the dry grout lines.
Avoid getting the liquid sealer on the face of glazed ceramic tiles, as it can leave a sticky, dull film if left to dry.
Sealer Application Checklist:
------------------------------------------
[ ] Wait 48 hours for the new grout to dry completely.
[ ] Paint the liquid sealer onto the grout lines.
[ ] Wipe excess sealer off the tiles within 5 minutes.
[ ] Let it cure for 24 hours before taking a shower.
------------------------------------------
Wipe away any excess sealer from the tiles within five minutes using a dry cloth.
Allow the sealer to cure for twenty-four hours before you run your shower or expose the walls to water.
Critical Mistakes to Avoid During Your Grout Repair Project
Working with tile grout is a simple task, but rushing the process can easily lead to messy and weak results.
Being aware of these five common pitfalls will help you protect your tiles and ensure your repairs last for years.
1. Adding Too Much Water to the Grout Mixture
When mixing dry grout powder, it is very tempting to add a lot of water to make it thin, runny, and easy to pour.
However, excess water dilutes the cement binders inside the grout, weakening its chemical structure.
Grout Mixing Ratios:
=============================================================
Mixture Type:                Resulting Strength:
-------------------------------------------------------------
1. Runny, watery grout       -> Weak, chalky, cracks as it dries.
2. Thick, peanut-butter grout -> Strong, solid, water-resistant.
=============================================================
Safety Rule: Always mix to a thick, hold-on-the-stick consistency.
=============================================================
As runny grout dries, the excess water evaporates, leaving behind thousands of tiny air pockets that make the grout chalky and brittle.
Always keep your mixture thick, and only add water in tiny, teaspoon-sized drops as you stir.
2. Using Cheap, Acidic Cleaners on Sealed Grout Lines
Once your new grout is sealed, you must avoid using heavy, acidic store-bought cleaners on your bathroom walls.
Strong acids like vinegar or citrus sprays will quickly dissolve the protective layer of your grout sealer.
Once the sealer is gone, dirty soap scum can easily sink back into the porous cement, staining your lines all over again.
Always use mild, pH-neutral soaps or plain warm water for your weekly bathroom cleaning routines.
3. Scraping Grout Too Close to Tile Edges
When removing old grout with a manual saw, it is easy to let your hand slip out of the joint.
If the hard metal blade hits the side of your ceramic tile, it can easily chip away the colored decorative glaze.
Keep your eyes focused on the center of the joint line, and use short, controlled strokes with the saw.
If you are using an electric rotary tool, always keep both hands on the tool to prevent it from jumping out of the track.
4. Forgetting to Use Protective Eye Gear and a Dust Mask
Scraping out old cement grout releases millions of tiny, sharp silica dust particles into the air.
Breathing in this fine mineral dust can irritate your lungs, throat, and nose, causing breathing issues.
Always wear a well-fitting N95 dust mask and protective safety glasses before you begin scraping your tiles.
Keep your bathroom window open or turn on the exhaust fan to keep the air moving as you work.
5. Running the Shower Before the Grout is Fully Cured
After a long weekend of hard work, you will likely feel eager to jump in your clean shower and test your new walls.
However, exposing fresh grout to running water before it is fully cured will wash away the active cement binders.
This leaves you with soft, washing-out joints that will quickly crack and crumble during your next shower.
Always wait at least twenty-four hours for the grout to dry, and another twenty-four hours after applying the sealer before turning on your water.
Taking Pride in Your Beautiful and Dry Bathroom
Restoring the grout lines in your bathroom is a fantastic home improvement project that instantly improves your home's hygiene.
It does not require expensive contractor equipment or a massive budget to achieve a clean, professional-looking result.
By taking your time to clean, prep, and seal your tile joints, you can protect your walls from hidden rot and damp mold.
You will feel a wonderful sense of comfort and pride every time you step into your bright, clean, and beautifully sealed shower.
Gather your basic tools, make your natural cleaning paste this weekend, and start enjoying a fresh and healthy bathroom space today.