The Hidden Dangers of a Flickering Wall Switch
You walk into your living room after a long day of work and flip the wall switch to turn on the overhead lights. Instead of a bright, steady glow, the light bulbs flicker weakly, accompanied by a faint, crackling sound inside the wall [11].
You toggle the plastic switch up and down a few times, hoping it will catch, but the room remains dark and cold. The annoying clicking sound and the sudden darkness leave you feeling frustrated and stuck.
Worse yet, that soft crackling noise is a sign of an active electrical arc, which is a major fire hazard. Your home is supposed to be your safe haven, but now a simple wall fixture has turned into a source of worry and fear.
Why Traditional DIY Electrical Advice Often Puts You in Danger
When homeowners look for quick solutions to fix a dead switch, they often run into bad advice online. Rushing into electrical work without the right safety knowledge can lead to severe accidents or permanent damage to your home's wiring.
Here are the main reasons why common DIY electrical tutorials can lead you astray:
- Relying on old video guides: Many tutorials show outdated wiring methods that violate modern electrical safety codes [12].
- Assuming all switches are the same: People often buy a standard single-pole switch when their room actually requires a more complex three-way switch setup.
- Skipping the voltage test step: Many beginners assume the power is off just because the light bulb is dead, ignoring the danger of live backup wires.
- Shoving wires randomly into the box: Rushing the process leads people to crowd the electrical box, which can pinch insulation and cause short circuits later.
- Over-tightening or stripping screws: Using the wrong screwdriver can ruin the brass terminal threads, leaving you with loose, sparking wire connections.
The Hidden Anxiety of Living with Unsafe Wiring
A broken light switch is not just an inconvenience; it can cause continuous mental stress for you and your family.
- The fear of accidental house fires: Knowing there is a loose, hot wire inside your wall makes it hard to sleep peacefully at night.
- Anxiety over expensive electrician bills: The dread of paying a professional contractor hundreds of dollars keeps you from getting the problem fixed.
- Feeling helpless in your own home: When basic fixtures do not work, you lose your sense of control and comfort in your living spaces.
- The risk of sudden electric shocks: Touching a faulty switch with damp hands can lead to a painful and dangerous shock.
Fortunately, you do not need to be a professional electrical contractor to replace a faulty switch safely. By following a few simple, proven steps, you can complete this task yourself and restore safety to your home.
The Step-by-Step Educational Guide to Safe Switch Replacement
To get the best results, you must approach electrical tasks with a structured plan. Working with household wiring is a lot like managing water flow through plumbing pipes; you must shut off the pressure before you open any connections.
We will break down the first three steps of the replacement process so you can work with complete confidence and safety.
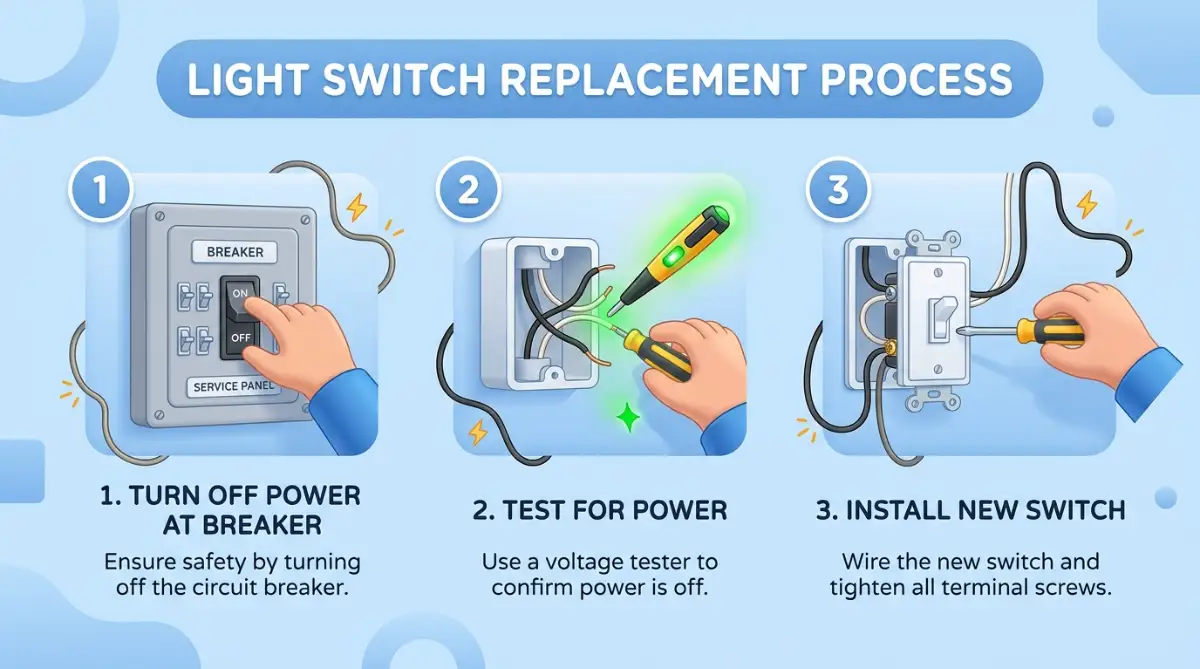
Step 1: Shutting Off the Power and Testing for Live Voltage (The Safety Prep)
The absolute biggest mistake you can make is working on a switch while the electrical current is still active. Never rely on simply turning off the wall switch to protect yourself, as current can still flow through the box.
The Physics of Household Electricity
To understand the danger, think of electricity like water under immense pressure inside a pipe.
The incoming hot wire behaves like a high-pressure line, while the neutral wire acts like the return path.
If you touch a bare hot wire, your body will become the easiest path for that pressure to escape to the ground.
How Electric Current Travels:
----------------------------------------------
Power Grid -> Hot Wire -> Your Body -> Ground (Dangerous Shock!)
Power Grid -> Hot Wire -> Switch -> Neutral Wire (Safe Circuit!)
----------------------------------------------
Even a small standard household current of 120 volts is strong enough to cause your heart to beat out of rhythm, which can be fatal.
The Triple-Check Safety Protocol
First, walk over to your home's main service panel (breaker box) and locate the circuit breaker that controls the room you are working in.
Flip the breaker switch to the complete "Off" position.
Walk back to the room and try to turn the light switch on and off to see if the lights react.
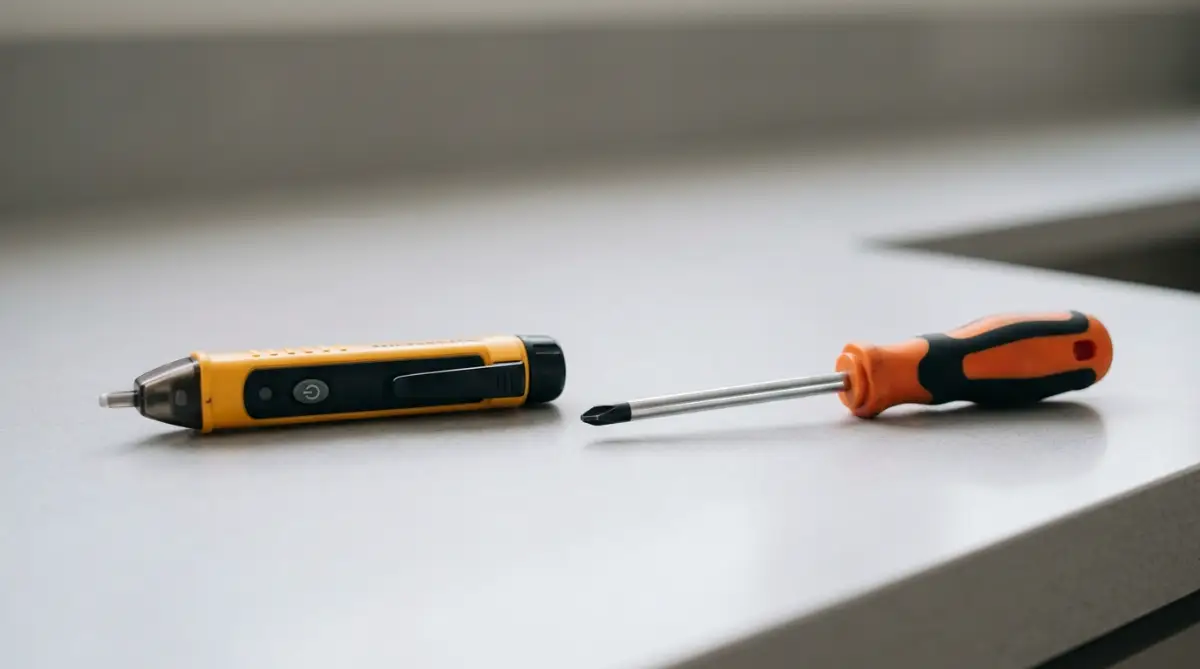
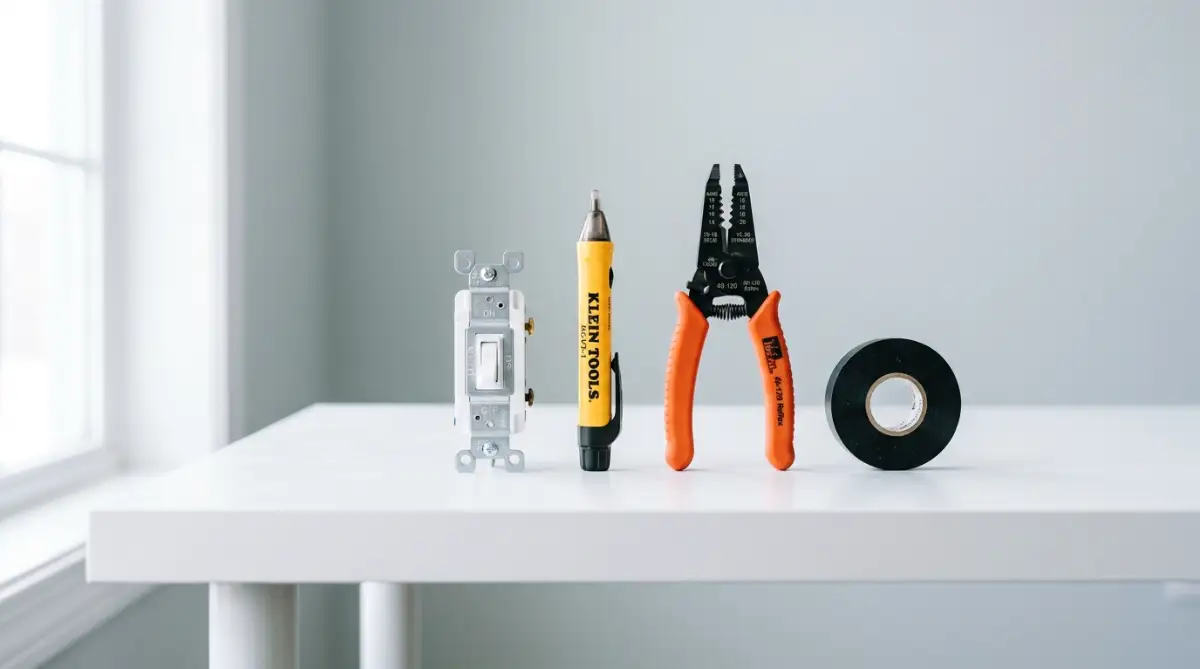
Next, unscrew the plastic wall plate from the switch and use a non-contact voltage tester pen.
Non-Contact Voltage Tester Guide:
+---------------------------------------------------------------+
| Light/Sound Signal | Meaning                                  |
+---------------------------------------------------------------+
| Red Light & Beep   | The wire is still live! Do not touch it! |
| No Light or Sound  | The power is safely disconnected.        |
+---------------------------------------------------------------+
Hold the tip of the tester pen near every single wire screw terminal inside the electrical box.
If the tester pen glows red or makes a chirping sound, the wire is still carrying a live current.
Go back to the breaker box and turn off the correct breaker before proceeding any further.
Step 2: Documenting and Labeling Your Existing Wires (The Mapping Stage)
Once you are absolutely certain the power is off, you can pull the switch out of the wall box.
However, do not disconnect any wires yet, as this is where many beginners get incredibly confused.
Why Wire Colors Can Be Deceiving
In standard modern home wiring, the black wire is usually the hot wire, the white is neutral, and the bare copper is ground.
However, in older homes or complex three-way switch setups, electricians often use white wires to carry active current.
If you simply disconnect all the wires without labeling them, you will have no idea where they belong on your new switch.
The Digital Photo Rescue Method
Before you loosen a single screw, grab your smartphone and take two or three clear photos of the wiring from different angles.
Make sure the photos clearly show which wire connects to the brass screws, the silver screws, and the green ground screw.
Standard Single-Pole Wire Guide:
------------------------------------------
[Top Brass Screw]    <--- Black Hot Wire (Line)
[Bottom Brass Screw] <--- Black Hot Wire (Load)
[Green Ground Screw] <--- Bare Copper Wire (Ground)
------------------------------------------
Wrap a small piece of colored masking tape around each wire and write its function on the tape using a pen.
This simple mapping process ensures you will not make a dangerous wiring mistake when installing your new hardware.
Step 3: Preparing the Wires and Mounting the New Switch
Now that your wires are mapped, you can disconnect them from the old switch and prepare them for the new connection.
Clearing Off the Old Corrosion
Over many years of use, copper wires can develop a layer of dark oxidation or corrosion that blocks electricity.
This corrosion increases electrical resistance, which generates heat and can cause your switch to burn out prematurely.
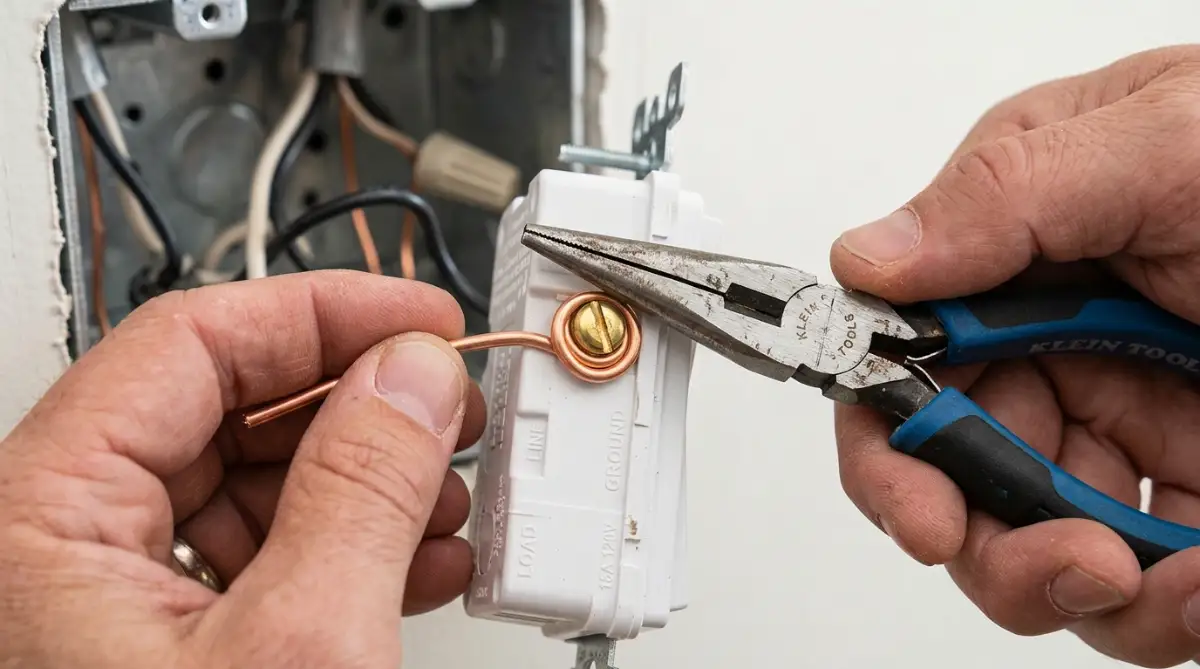
Use a wire stripping tool to cut back any dark, damaged wire tips and expose about three-quarters of an inch of fresh, shiny copper.
The Clockwise Loop Technique
When connecting your fresh copper wire to the new switch, you must wrap it around the terminal screw correctly.
Bend the bare wire end into a tight "U" shape using a pair of needle-nose pliers.
Hook the wire loop over the screw terminal so that the loop wraps around the screw in a clockwise direction.
Screw Terminal Wrapping Guide:
+---------------------------------------------------------------+
| Loop Direction | What Happens When You Tighten the Screw     |
+---------------------------------------------------------------+
| Clockwise      | The loop pulls tightly around the screw stem.|
| Counter-Clock  | The loop opens up and pushes off the screw.  |
+---------------------------------------------------------------+
If you wrap the wire counter-clockwise, the rotation of the screw will push the wire loop outward as you tighten it.
This leaves you with a loose connection that will eventually spark and cause the switch to fail.
Tighten the brass terminal screws firmly using a screwdriver, making sure no bare wire is sticking out from the back of the switch.
By taking these three essential steps, you have built a strong, safe, and professional-grade electrical connection. Your new switch will operate quietly without any dangerous sparking or heat buildup inside your wall.
Step 4: Mastering the Grounding Connection for Complete Protection
Many older homes do not have a dedicated grounding system, but modern electrical codes require all switches to be grounded [13].
The ground wire is your ultimate shield against accidental electric shocks if a wire comes loose inside the box.
Grounding Protection Path:
=======================================
Loose Hot Wire ---> Touches Metal Box ---> Travels Down Ground Wire ---> Safe Ground
                                                    |
                                           (Breaker Trips Safely)
=======================================
Connecting the Ground Wire Safely
Locate the bare copper or green insulated wire inside your wall box and connect it to the green screw on your new switch.
If you are using a metal electrical box, you must also connect a ground wire directly to the box itself using a grounding screw.
This ensures that if a hot wire accidentally slips and touches the metal box, the current will travel safely into the ground rather than through your hand when you touch the switch plate.
Step 5: Folding Wires and Mounting the Switch Plate
The final physical step is pushing the switch back into the wall box and attaching the plastic cover plate.
This seems simple, but forcing the wires back into the box incorrectly can cause serious problems over time.
The Accordion Folding Method
Never simply shove the wires back into the wall box with force, as this can pinch the plastic insulation and expose bare copper.
Instead, gently fold the thick copper wires back and forth in an accordion pattern against the back of the box.
How to Fold Wires Safely:
------------------------------------------
1. Push the hot and neutral wires to the back corners first.
2. Fold them in a loose "Z" pattern like an accordion.
3. Keep the bare copper ground wire away from the brass screws.
------------------------------------------
This keeps the bare ground wire safely away from the hot brass terminal screws, preventing sudden short circuits when you turn on the power.
Critical Mistakes That Can Cause Electrical Disasters
When working with home electricity, even a small, simple oversight can lead to a dangerous situation.
Being aware of these five common pitfalls will help you keep your home safe from electrical fires and shocks.
1. Using Back-Stabbed Wire Connections Instead of Screw Terminals
Many modern switches have small holes in the back where you can simply push the bare wire in to connect it.
Electricians call this "back-stabbing" the switch, and while it is fast, it is highly unreliable.
Wiring Connection Quality:
=============================================================
Method:                      Reliability:
-------------------------------------------------------------
1. Side-terminal screws      -> Highly secure, permanent connection.
2. Back-stabbed push holes   -> Weak tension spring, prone to loosening.
=============================================================
Safety Recommendation: Always use side screws for safety.
=============================================================
The small metal springs inside these push holes lose their tension over time, leading to loose connections and sparking.
Always wrap your wires around the side-terminal screws to ensure a permanent, secure, and spark-free connection.
2. Forgetting to Wrap Electrical Tape Around the Switch Terminals
After wiring your new switch, some beginners immediately push it back into the wall box without any insulation.
This is risky, especially if you are working with a tight, metal electrical box.
Always wrap two layers of black electrical vinyl tape around the entire perimeter of the switch, covering all the exposed screw terminals.
This simple tape barrier prevents the hot terminal screws from accidentally touching the sides of a metal wall box as you slide it in.
3. Mixing Up Line and Load Hot Wires on a Dimmer Switch
If you are upgrading your standard toggle switch to a modern dimmer switch, you must identify the "line" and "load" wires.
The "line" wire carries active power from your breaker box, while the "load" wire sends that power up to the light fixture.
If you connect these wires backward on a smart dimmer, the unit's internal computer chips can burn out instantly.
Refer to your labeled tape markers from Step 2 to make sure the line wire connects to the correct power terminal on your dimmer.
4. Over-Tightening the Wall Plate Screws and Cracking the Plastic
When attaching the final plastic wall plate, it is easy to get over-enthusiastic with your screwdriver.
Over-tightening these small screws will quickly crack the fragile plastic plate, leaving you with an ugly, damaged finish.
Tighten the wall plate screws gently until they meet the plastic, then stop immediately.
Align the slots of the screws vertically for a clean, professional look that matches the work of a licensed electrician.
5. Ignoring a Warm or Smelly Switch After Turning on the Power
After you turn the circuit breaker back on, monitor the new switch closely for the first few minutes of operation.
If the plastic cover plate feels warm to the touch, or if you notice a faint, fishy, burning plastic odor, turn the breaker off immediately.
These signs indicate a loose connection inside the box that is generating high heat and melting the wire insulation.
Re-open the box and verify that all your terminal screws are wrapped clockwise and tightened securely to the copper.
Restoring Safety and Light to Your Home with Pride
Completing your first home electrical project is an incredibly empowering experience that builds your DIY confidence.
By taking your time, using a voltage tester, and avoiding the common mistakes, you can replace a faulty switch safely.
You will feel a deep sense of pride every time you flip that quiet, smooth wall switch to light up your home.
Keep your tools organized, prioritize safety at every step, and enjoy your bright, comfortable, and beautifully lit living spaces.