How to Seal Drafty Windows to Save Money on Heating Bills
You're sitting near the window, and even with the heat running, you feel it. That thin, cold draft sneaking in along the edge of the frame.
You turn the thermostat up a couple of degrees to compensate. Then a few degrees more next week. And somehow, the room still doesn't feel quite warm enough.
Here's what's actually happening. That draft isn't just uncomfortable. It's quietly costing you money every single day it goes unfixed.
Why a Drafty Window Becomes a Daily Source of Stress
A leaky window doesn't just let in cold air. It changes how your whole home feels and how much you spend keeping it warm.
- You catch yourself avoiding your favorite chair or spot near the window because it's just too cold
- Your heating bill climbs higher each month, and you can't quite explain why
- You feel a draft but can't pinpoint exactly where it's coming from
- You're hesitant to spend money on a fix without knowing if it'll actually work
A lot of people assume the only real solution is replacing the entire window, which feels expensive and overwhelming. So they put it off, season after season, while the cold air keeps creeping in.
- Full window replacement can cost a significant amount per window, which stops many people before they even start
- Most drafts don't actually come from the glass itself, they come from small gaps around the frame
- Without knowing where the gap actually is, people sometimes seal the wrong spot and wonder why it didn't help
- Misinformation online often skips straight to "replace your windows," ignoring much cheaper fixes that work just as well
There's a quieter frustration here too. Watching your heating bill climb while still feeling cold in your own home chips away at how comfortable you feel, even in spaces that should be relaxing.
- It can feel discouraging to spend more on heating and still not feel warm enough
- It adds a layer of guilt around energy use, especially if you're trying to manage a tighter budget
- It can make winter feel longer and harder than it needs to, just because of a fixable gap around a window frame
Here's the encouraging part: sealing a drafty window is one of the cheapest and fastest home fixes you can do, often for less than the cost of a single inflated heating bill.
Cold air finds its way in through small gaps where the window frame meets the wall, where the sash meets the frame, or through worn-out weatherstripping that's lost its seal over time. Even a gap as thin as a credit card can let in a surprising amount of cold air, similar to how a small hole in a boat lets in water faster than you'd expect from its size.
The fixes below target these exact gaps directly, using inexpensive materials that block airflow without needing any tools beyond what you probably already have at home.

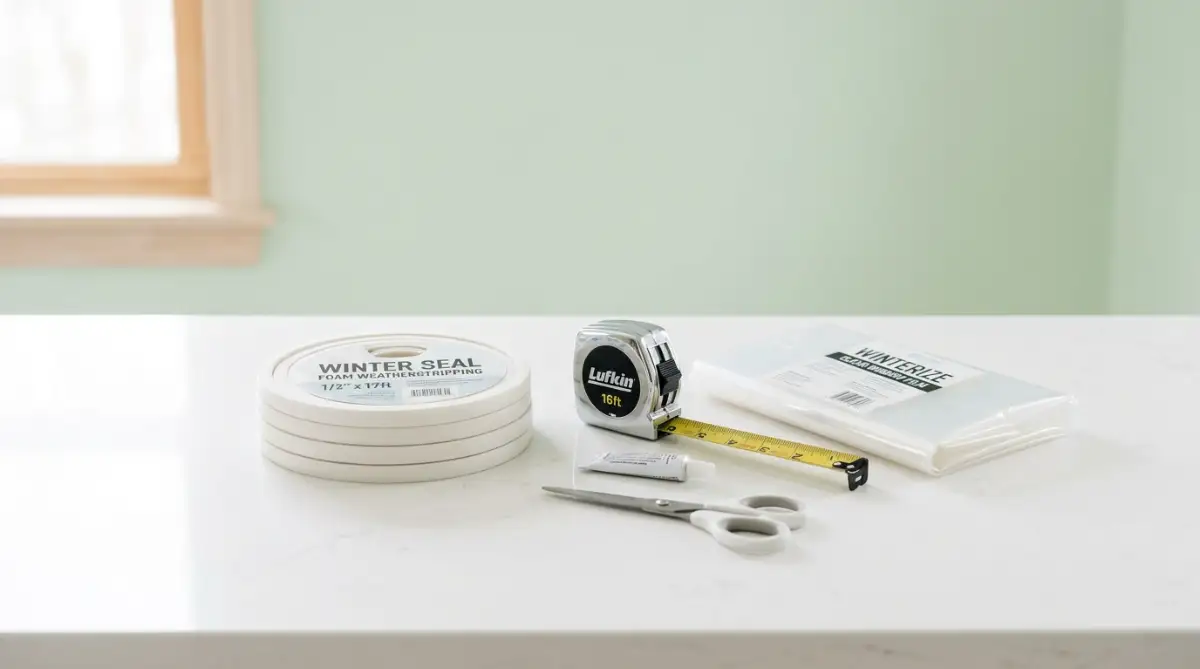
What You'll Need Before You Start
Here's what to gather:
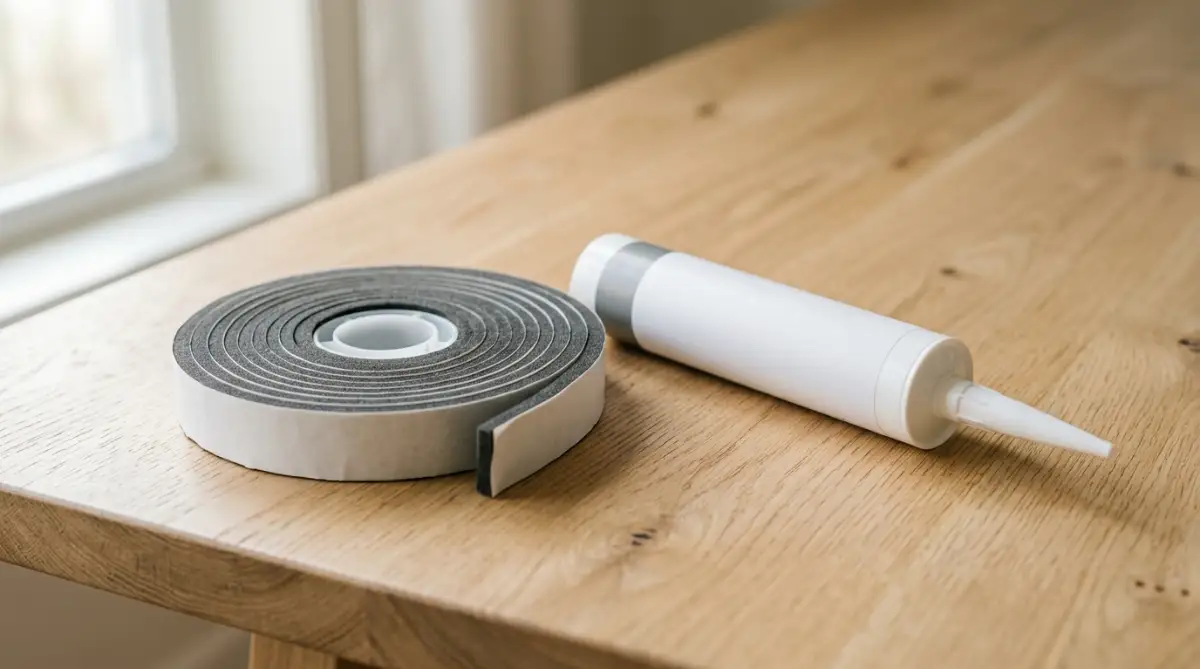
- Weatherstripping tape (foam or rubber, found in any hardware store)
- Caulk (acrylic latex caulk works well for most window frames)
- A caulking gun
- A putty knife or old credit card for smoothing
- A draft stopper or door snake for the bottom of the window
- A lighter or incense stick (to help locate drafts, used carefully and never left unattended)
None of this requires a big budget. Most of it costs just a few dollars total.
Step 1: Find Exactly Where the Draft Is Coming From
You can't seal a gap you haven't located. This step takes a few minutes and saves you from guessing.
Hold a lit candle, lighter, or lightly smoking incense stick near the edges of the window frame on a windy or cold day. Watch the flame or smoke closely.
If it flickers or bends at a certain spot, that's your draft. Mark the area lightly with a pencil or a small piece of tape so you remember exactly where to focus.
Check all four sides of the frame, plus where the two window sashes meet in the middle. Drafts often hide in more than one spot, so don't stop after finding the first one.
A quick safety note: keep any open flame away from curtains or anything flammable, and never leave it unattended even for a few seconds.
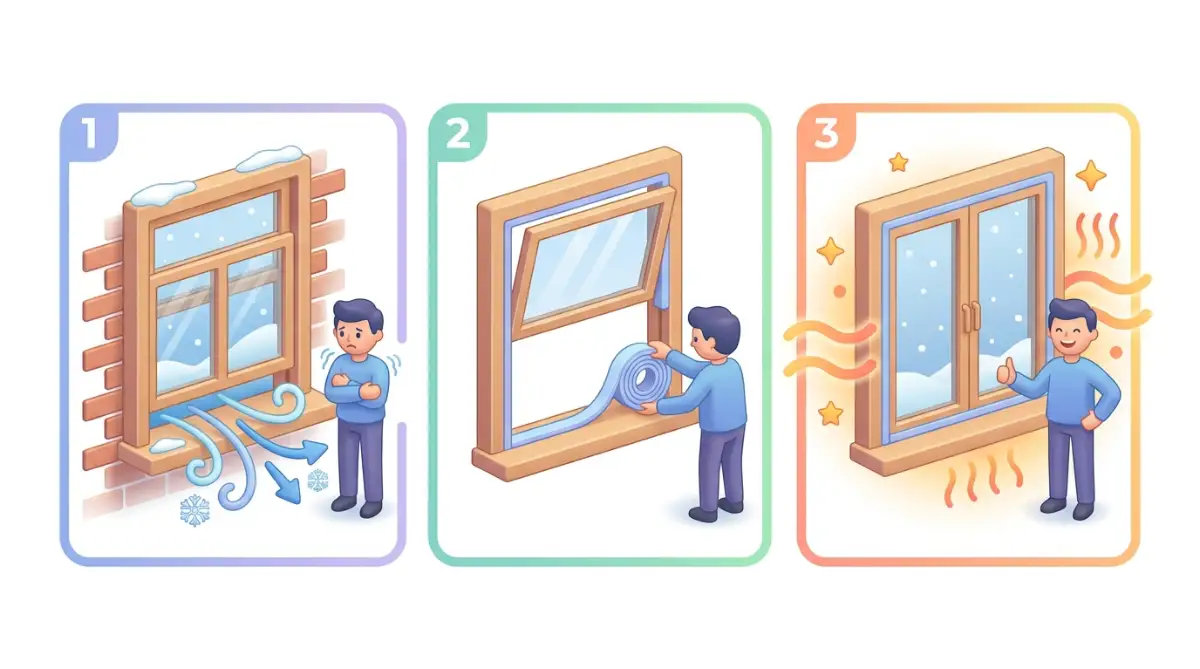
Step 2: Apply Weatherstripping Along the Sash Gaps
Once you've found the gaps, weatherstripping handles most of the moving parts of your window.
Clean the area first with a damp cloth and let it dry completely. Weatherstripping won't stick well to dust or old, peeling adhesive.
Measure the length you need and cut the weatherstripping tape to size. Peel back the adhesive backing slowly as you press it into place along the frame where the window sash meets it.
Press firmly along the entire strip, especially at the ends, to make sure it's fully sealed. Close the window gently afterward to check that it still shuts smoothly without excessive resistance.
Think of weatherstripping like a gasket on a refrigerator door. It needs full, even contact to actually block airflow, not just sit loosely near the gap.
Step 3: Caulk the Gaps Where the Frame Meets the Wall
Weatherstripping handles moving parts. Caulk handles the gaps that never move at all, like where the window frame meets the surrounding wall or trim.
Load your caulking gun and cut the tip at a small angle for a thin, controlled bead. Apply a steady line of caulk along any visible gap between the frame and the wall.
Smooth the caulk immediately with a damp finger, a putty knife, or an old credit card before it starts to set. This gives you a clean, even seal instead of a messy ridge.
Let it cure fully, usually about twenty-four hours, before testing for drafts again. Avoid touching or pressing on fresh caulk during this time, since it needs that full window to bond properly.
A simple way to think about why this works: caulk fills tiny, permanent gaps the same way grout fills the spaces between tiles. Once it sets, air has nowhere to sneak through anymore.
If you've sealed the sash gaps and caulked the frame edges and you're still catching a draft somewhere, it's worth checking the glass itself and the surrounding trim, which we'll walk through in the next part of this guide.
Beyond the Frame: Sealing the Spots Most People Miss
If you've weatherstripped the sashes and caulked the frame edges but you're still catching a chill, the leak is probably hiding in one of these less obvious spots.
Trick 1: Add a Door Snake or Draft Stopper to the Window Sill
This trick gets used on doors constantly, but people forget windows can benefit from it too.
Place a draft stopper or rolled towel along the bottom sill of any window that sits low or near a frequently used room. Cold air sinks, so the bottom of a window often lets in more draft than the top.
A simple version costs almost nothing to make. Fill an old sock with rice or dried beans, tie off the end, and lay it along the sill. It works the same way a store-bought draft stopper does, just with materials already in your house.
Trick 2: Use Window Film for Single-Pane Glass
If your windows are older single-pane glass, the glass itself can be letting cold through even after you've sealed every gap around the frame.
Apply a clear plastic window insulation film using double-sided tape around the frame, then shrink it tight with a hair dryer on low heat. This creates a thin layer of trapped air between the film and the glass.
That trapped air layer works the same way a double-pane window does naturally. It's not a permanent fix, but it can make a real difference for a single cold season at a fraction of the cost of replacing the glass.
Trick 3: Check and Replace Foggy or Cracked Glazing Putty
Older windows sometimes use glazing putty, a hardened compound that holds the glass pane into the frame. Over years, this putty can crack, shrink, or fall away entirely.
Run your finger gently along the edge of the glass pane where it meets the wooden frame. If you feel gaps, missing chunks, or crumbling putty, that's likely letting cold air straight through.
Reapplying glazing putty is a simple but slightly slower fix, since it needs to cure for several days before painting over it. Still, it's far cheaper than replacing the whole window, and it solves a leak that weatherstripping and caulk alone can't touch.
Holding Onto Your Warmer, Cheaper Winter
Sealing your windows once feels great. Making sure that seal lasts through the whole season is what actually saves you money.
A few habits keep your results holding strong:
- Check your weatherstripping at the start of every cold season, since foam strips compress and wear out faster than rubber ones
- Reapply caulk wherever you notice cracking, which tends to happen most around frames that get direct sun exposure
- Keep curtains or blinds open during sunny daytime hours to let in passive heat, then close them at night to trap warmth inside
- Walk around your home with your hand near each window edge on a cold day, checking for drafts you might have missed the first time
Think of this the same way you'd think about checking your car's tire pressure. A small, regular check catches small problems before they turn into bigger, more expensive ones.
One more thing worth knowing: weatherstripping foam typically lasts one to three years, depending on how often the window opens and closes. If a window gets used daily, expect to replace that strip sooner than a window that stays shut most of the year.
Five Mistakes That Undo Your Sealing Work
Even a careful sealing job can fail if one of these mistakes sneaks in.
Mistake 1: Caulking Over Dirt or Old, Peeling Caulk
Caulk needs a clean surface to bond properly. Applying fresh caulk over old, cracked caulk or dust usually means it peels away within weeks.
Always remove old caulk completely and wipe the area clean before applying a new bead.
Mistake 2: Sealing a Window Shut That You Still Need to Open
Some people get so focused on blocking drafts that they accidentally seal the window completely shut with caulk in spots that should stay flexible.
Never caulk directly over the moving seam where the window opens, only the fixed edges where the frame meets the wall.
Mistake 3: Skipping the Draft-Finding Step Entirely
Sealing randomly without locating the actual draft first wastes time and materials on spots that were never the problem.
Always find the draft before reaching for caulk or weatherstripping.
Mistake 4: Using the Wrong Caulk for the Material
Not all caulk works on all surfaces. Using caulk meant for masonry on a wood frame, or vice versa, often leads to poor adhesion and an early failure.
Check the label for compatibility with your specific frame material before buying.
Mistake 5: Forgetting to Let Caulk Cure Before Testing
Touching, pressing, or opening the window too soon after caulking disturbs the seal before it fully sets, leaving gaps you won't notice until the cold returns.
Give caulk a full twenty-four hours before testing for drafts again.
A Warmer Home Starts With a Few Small Fixes
Here's the good news hiding behind every drafty window: this is one of the most affordable home fixes that actually moves your heating bill.
You don't need a full window replacement to feel warmer this winter. A few dollars in weatherstripping and caulk, paired with an hour of your time, can seal out the cold air that's been quietly working against your thermostat.
Walk around your home today and check just one window. Once you feel how much warmer that spot becomes, you'll want to do the rest before the season gets any colder.