The Hidden Cost of Ignoring Your Heating and Cooling Equipment
I will never forget that sweltering July afternoon when my living room turned into an oven. My central AC unit let out a loud, terrifying screech and started blowing muggy, hot air right into our faces. Within two hours, my kids were sweating, the dog was panting on the kitchen tiles, and my phone was glued to my ear trying to find an emergency repairman.
When the technician finally pulled into my driveway two days later, he took one look at my choked outdoor unit and handed me a repair bill for 1,800 USD. The worst part? He told me that just twenty minutes of basic DIY cleaning and a fresh air filter would have prevented the whole breakdown. That painful bill taught me a serious lesson: ignoring basic heating and cooling maintenance is like throwing stacks of cash straight out the window. It is one of the most brutal hidden expenses of owning a home that catches property owners off guard. If you want to keep your home cool in July, warm in January, and stop overpaying your power company, here are the real-world maintenance steps I now follow religiously.
Quick Summary: How to Avoid a 2,000 USD HVAC Breakdown
- Swap Filters Every 30–60 Days: A clean filter prevents your indoor coils from freezing and cuts your monthly electric bill by up to 15%.
- Clear Outdoor Coils Twice a Year: Hose down your outdoor unit and keep a 2-foot clear zone around it to prevent your compressor from overheating.
- Flush Your Condensate Line Monthly: Pouring one cup of regular distilled white vinegar down the drain pipe stops slimy algae plugs and saves your ceilings from water leaks.
- Track Your Temperature Split: Measuring the heat difference between your return and supply vents lets you catch low refrigerant issues before your system dies.
Practical Habits to Keep Your System Running Smoothly
Master the Simple Art of Air Filter Care
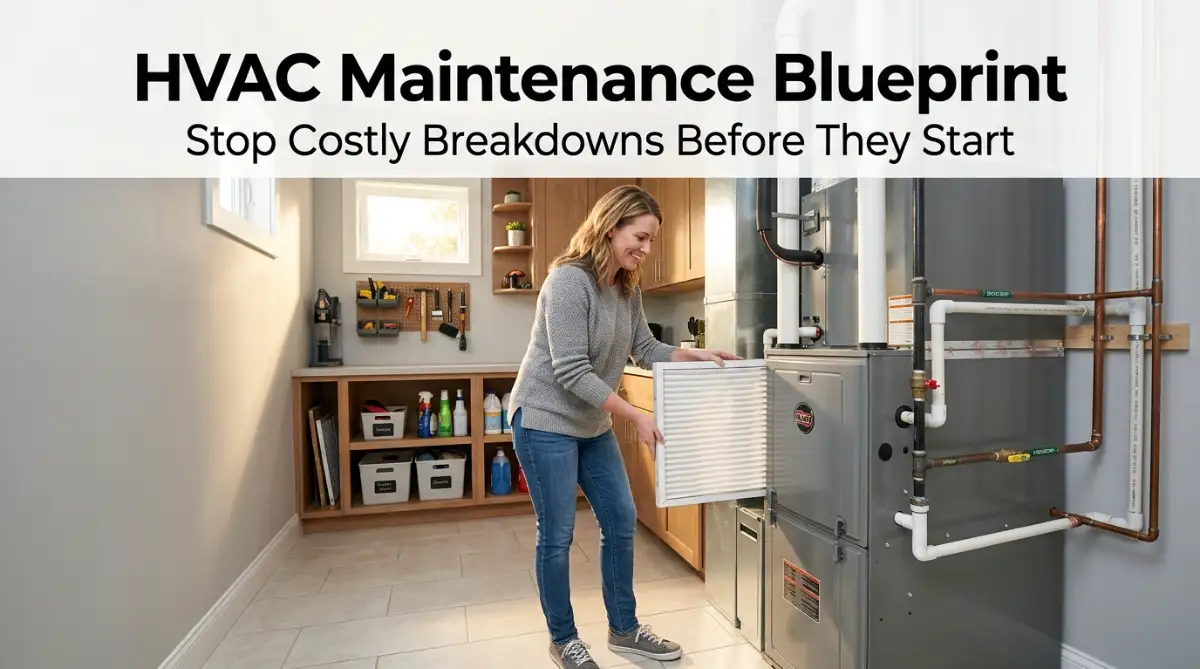
The air filter is the lungs of your entire heating and cooling setup. Its primary job is not just cleaning the air you breathe, but protecting delicate blower fans and coils from dust buildup.
When a filter fills with pet hair, dust, and lint, air cannot move freely through the return ducts. This choking effect causes the indoor evaporator coil to freeze into a block of solid ice.
Check your filter every thirty days by holding it up to a bright light source. If light cannot pass through the pleats easily, throw it away and slide in a clean replacement.
Standard one-inch fiberglass filters should be replaced every single month during heavy summer and winter usage. Thicker four-inch media filters can often last four to six months before needing attention.
Never buy the most restrictive medical-grade allergen filter unless your system fan is specifically built to handle that resistance. High resistance strains older blower motors and can cause them to overheat and burn out prematurely.
Protect and Clear the Outdoor Condenser Space
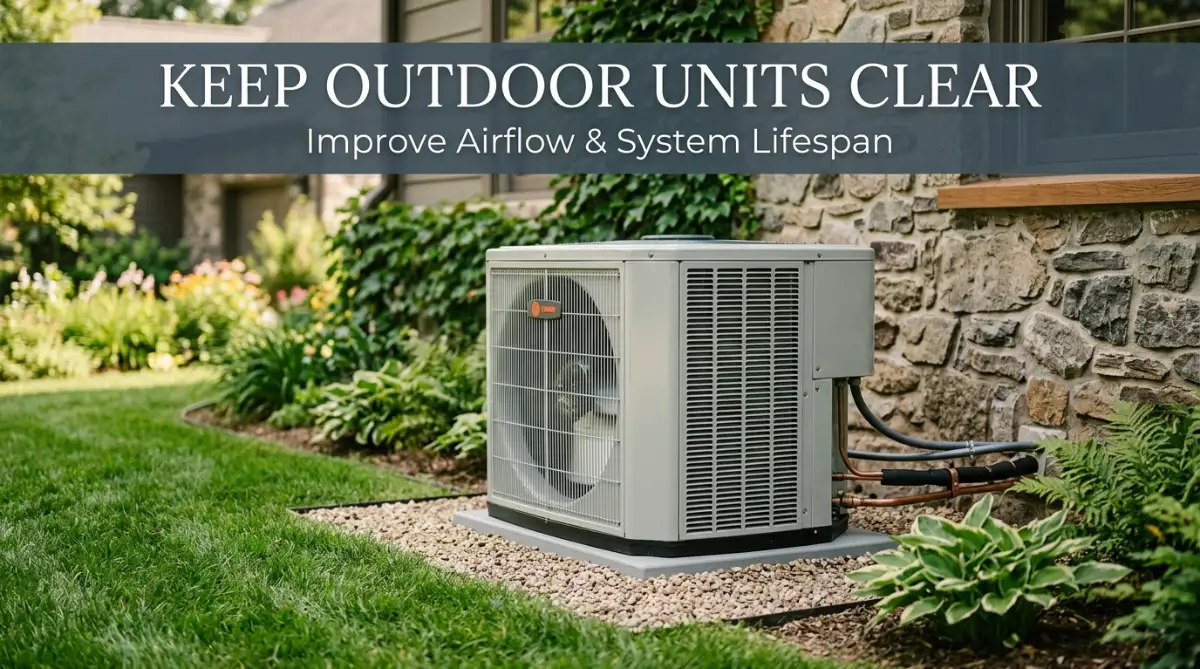
Your outdoor unit is responsible for releasing all the heat extracted from inside your home. If the metal fins are choked with grass clippings, dirt, or fallen leaves, heat remains trapped inside the system.
Walk around your outdoor unit once every week to check for encroaching plants, weeds, or stored garden items. Keep a clear safety perimeter of at least two feet on every side to maintain proper air intake.
Turn off the electrical disconnect switch mounted on the exterior wall before touching the outdoor unit. This keeps you safe from high voltage and unexpected fan starts while you clean.
Use a standard garden hose with a gentle spray nozzle to wash away dirt from the metal fins. Always spray from the inside out or from the top down to avoid bending the delicate aluminum fins.
Never use a high-pressure power washer on your outdoor unit. Intense water pressure will instantly crush the thin aluminum fins and completely block essential airflow.
If you spot bent fins, purchase an inexpensive fin comb tool from a hardware store to gently straighten them out. Straight fins keep airflow smooth and prevent high head pressure inside the refrigerant lines.

Clear the Condensate Drain Line to Stop Water Damage
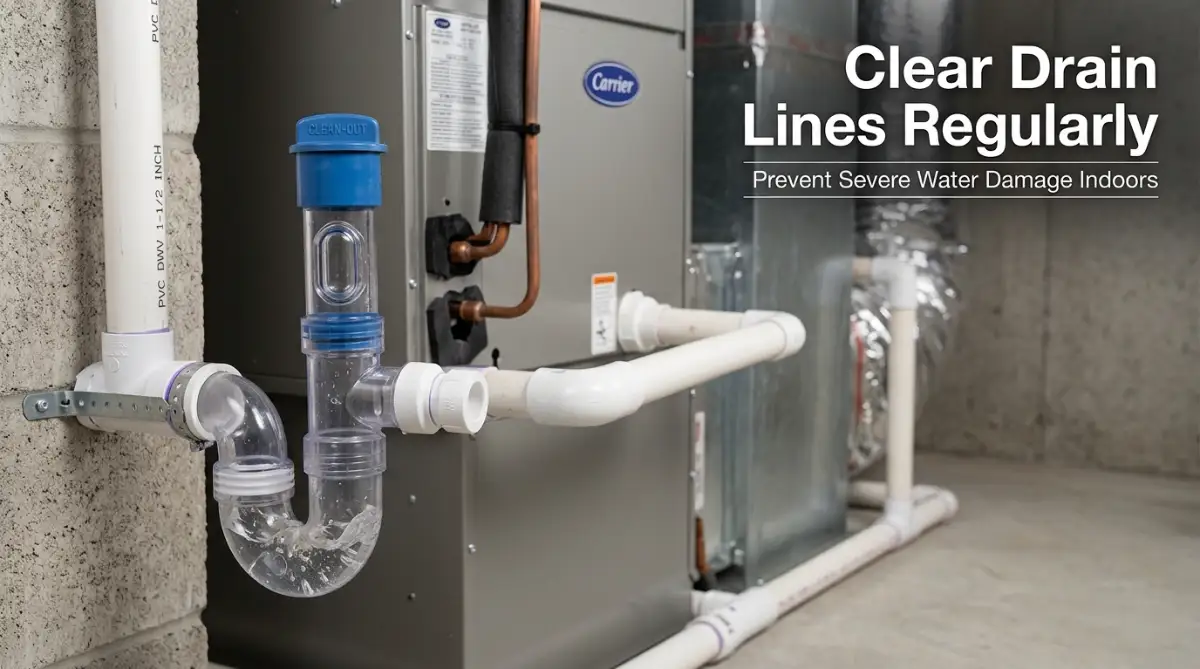
As your air conditioner pulls moisture from the air, it produces gallons of water every day. This water collects in a drain pan and flows outside through a small PVC pipe.
Over time, dark and damp drain lines become a breeding ground for algae, slime, and mold. When the line clogs, water backs up and overflows the internal drain pan.
This overflow can ruin your ceilings, warp hardwood floors, and cause thousands of dollars in hidden structural damage. Many modern systems will shut down completely when a float switch detects standing water in the pan.
Pour one cup of regular distilled white vinegar down your condensate drain access point every month during cooling season. The natural acidity breaks down algae build-up without eroding the plastic PVC pipes.
Avoid using harsh chemical drain cleaners or bleach inside your condensate line. Bleach fumes can enter your indoor ductwork, and strong chemicals can eat away at the drain pan glue joints.
If your line is already clogged, attach a wet-dry shop vacuum to the outdoor drain exit pipe. Seal the connection with your hand or a rag and run the vacuum for two minutes to pull out the slime blockage.
Here is a hands-on visual guide that walks you through every essential DIY step—from safely washing your outdoor fins to flushing out dirty drain lines step by step:
📺 Watch the Step-by-Step Guide:
15 Air Conditioner Maintenance Tips by Word of Advice TV (Full 32-Minute Complete DIY Masterclass from a licensed USA HVAC technician)
Clean the Indoor Evaporator Coils
The indoor evaporator coil absorbs heat and humidity from your home's air as it passes through the air handler. Over several years, microscopic dust particles slip past basic filters and coat these cold, wet metal fins.
Think of dirt on your indoor coil like a heavy winter coat wrapped around an ice pack. When dust coats the metal fins, the refrigerant inside cannot pull heat out of your home. Your unit will end up running for hours without lowering the room temperature even two degrees. Once a year, I grab a can of self-rinsing foaming coil cleaner, pop open the air handler panel, and spray it down thoroughly. The normal condensation rinses the grime right into the drain pan without any scrubbing.
Maintain Proper Airflow Across Supply and Return Vents
Many homeowners believe that closing supply vents in unused rooms saves energy and money. In reality, closing vents disrupts the balanced pressure designed into your duct system.
Closing more than ten percent of your home's vents increases static pressure inside the supply ductwork. This excess pressure strains the blower motor and causes air leaks along sealed duct joints.
Keep all interior supply registers and large return grilles open and unobstructed by furniture, drapes, or rugs. Free airflow keeps temperatures consistent throughout your entire home.
Check visible duct runs in basements, attics, and crawlspaces for disconnected seams or torn insulation. Leaky ducts can lose up to thirty percent of conditioned air before it ever reaches your living spaces.
Use professional foil-backed mastic tape to seal any air leaks you discover along duct joints. Avoid using standard gray cloth duct tape, which dries out, cracks, and fails after just a couple of seasons.
Optimize Your Thermostat Settings for Longevity
Constantly cranking your thermostat up and down puts unnecessary thermal shock on your compressor and heating elements. Setting a reasonable baseline temperature prevents short-cycling, where the equipment turns on and off too frequently.
Install a programmable or smart thermostat to automatically adjust temperatures when you are asleep or away at work. Raising the temperature by four degrees while you are away reduces mechanical runtime significantly.
I made the mistake of setting my thermostat to extreme low temperatures on hot days, thinking it would cool the house faster. I ended up burning out a contactor relay because the unit ran for six hours without a single break.
Modern thermostats also feature built-in compressor protection delays. These safety delays prevent the compressor from restarting immediately after a power flicker, saving the motor from severe electrical resistance.
Inspect Electrical Connections and Moving Components
Vibration from normal motor operation can loosen wiring connections over time. Loose electrical connections create resistance, generating heat that melts wire insulation and damages expensive circuit boards.
Look at the main disconnect box and furnace wiring harness for any signs of black charring or melted plastic. If you see signs of overheating, contact a licensed technician immediately to replace the damaged terminals.
Older blower motors often have small oil ports that require seasonal lubrication to run smoothly. Adding a few drops of non-detergent motor oil keeps bearings quiet and prevents catastrophic motor seizure.
Listen closely to your equipment when it starts up and shuts down each day. Squealing, grinding, or rapid clicking noises are clear warning signs that a mechanical bearing or electrical relay is failing.
Catching a noisy bearing early allows you to replace a twenty-dollar part instead of an entire thousand-dollar motor assembly. Pay attention to changes in system sounds and investigate unusual rattles right away.
Maintain Proper Clearance Around Indoor Units
The area surrounding your indoor furnace or air handler should never be used as a storage closet. Stacking boxes, paint cans, and cleaning chemicals near equipment creates serious fire and airflow hazards.
Gas furnaces and boilers need adequate combustion air to burn fuel cleanly and safely. Suffocating the unit with clutter leads to incomplete combustion and dangerous carbon monoxide buildup inside the home.
Keep a minimum clear space of three feet around your indoor furnace or air handler at all times. This clearance gives you easy access for routine filter swaps and allows technicians to work efficiently during annual inspections.
Store volatile household chemicals, paints, and gasoline far away from heating equipment. Corrosive chemical vapors drawn into the combustion chamber will rot heat exchangers from the inside out.
Monitor Refrigerant Lines and Pipe Insulation
The copper pipes connecting your indoor and outdoor units carry refrigerant that moves heat out of your home. The larger copper pipe should always be covered in thick, intact foam insulation.
Exposed copper lines absorb outdoor heat, forcing your compressor to work harder to maintain cooling capacity. Sun exposure and birds often tear away old foam insulation over time.
Inspect the black foam insulation on your outdoor lines each spring before the hot weather arrives. Replace missing or rotted sections with new foam pipe insulation sleeves from your local home center.
Secure the insulation tightly using UV-resistant zip ties or specialized outdoor insulation tape. A well-insulated suction line maintains proper refrigerant temperatures and protects overall cooling efficiency.
Prepare Your System for Seasonal Transitions
Never switch your system straight from heavy furnace heating to ice-cold air conditioning in the same 24 hours. Give the system a break. In the spring, make sure you take off any canvas winter covers before you touch the thermostat—turning on an AC with a cover on will burn out the compressor within minutes. Run a test cooling cycle on a mild 70°F spring afternoon so you have time to fix any quirks before the summer heat hits.
The Real Estate Value of a Well-Maintained System
From a property value perspective, your heating and cooling equipment is one of the most scrutinized mechanical systems when buyers are inspecting a house before making an offer. Home inspectors carefully check age, condition, temperature splits, and maintenance history.
A clean, smoothly operating unit with documented service records gives prospective home buyers immense confidence. It proves that you have cared for the property responsibly, making your home stand out in competitive markets.
Conversely, a neglected, filthy system with rusted drain pans and noisy motors can easily trigger repair contingencies or contribute to low home appraisals before closing.
Spending a small amount of time and money on basic maintenance protects your everyday comfort and preserves equity alongside other simple DIY upgrades to boost your home value. Consistent care ensures you get the full fifteen to twenty years of service life from your original investment.
Expert-Level Strategies to Maximize Heating and Cooling Performance
Checking Temperature Split to Measure True Cooling Power
One of the most reliable ways to test your cooling equipment is measuring the temperature split, often called the Delta-T. This simple test tells you whether your system is actually absorbing and removing heat properly.
To run this test, turn on your cooling system and let it run for fifteen consecutive minutes. Take a standard digital probe thermometer and place it directly inside the return air vent closest to your indoor air handler.
Record that supply number, and then insert the thermometer into the supply vent nearest to the air handler. Subtract the supply reading from the return reading to find your temperature split.
A healthy, well-charged air conditioner should show a temperature difference between sixteen and twenty degrees Fahrenheit. If your split is under fourteen degrees, your equipment may suffer from low refrigerant charge, dirty coils, or weak airflow.
If the split is higher than twenty-two degrees, your system is likely starving for air due to dirty filters or crushed ductwork. Tracking this number every few months allows you to spot performance drops before components fail completely.
Monitoring Run Capacitors and Electrical Contactors
Your outdoor compressor and fan motor rely on a small metal cylinder called a dual-run capacitor to start and run smoothly. Capacitors act like temporary storage batteries, delivering the extra voltage push required during startup cycles.
Over seasons of hot weather, electrical heat and voltage spikes cause these capacitors to degrade and lose their rated capacitance. When a capacitor drops below ten percent of its marked microfarad rating, the compressor motor strains to start.
This electrical strain generates intense heat inside the motor windings, which can destroy the compressor within a few weeks. Replacing a weak capacitor costs around twenty to forty USD in parts, while a burned-out compressor can easily cost over 2,000 USD.
Look at the top of your outdoor capacitor during annual visual checks after disconnecting the main power. If the flat top of the metal cylinder appears swollen, domed, or oily, the capacitor has failed and needs replacement.
Inspect the contactor switch next to the capacitor for black carbon pitting on the copper contact points. Electrical arcing burns these points over time, which can weld the switch shut and keep your outdoor fan running continuously until the motor burns up.
Sealing Attic Duct Leaks and Managing Static Pressure
Your duct system acts as a sealed circulatory loop, moving treated air through your home and pulling return air back to be reconditioned. Even tiny holes along attic duct seams pull dusty, superheated air into your living spaces.
The U.S. Department of Energy (Energy Saver) confirms that leaky duct systems reduce overall heating and cooling efficiency by more than twenty percent. This lost air forces your system to run extra hours every single day, driving up your power bills and adding unnecessary mechanical wear to your compressor.
To find duct leaks, turn on your system fan and walk through your attic or crawlspace while feeling along every joint. Inspect sheet metal connections, flexible duct collars, and plenum boxes for escaping air blasts.
Seal every accessible joint with thick duct mastic paste applied with a simple paintbrush, reinforced with fiberglass mesh tape. Mastic paste creates a permanent, flexible seal that will not dry out or crack when temperatures swing from freezing to scorching heat.
Real-World Fact Check: The Closed Vent Trap
- The Common Belief: "Closing vents in empty guest rooms cuts down my electric bill."
- The Reality: HVAC ducts work on balanced airflow and static pressure. When you close more than two registers, pressure spikes inside the main trunk line. This forces air leaks through duct seams and makes the blower motor pull extra electrical current.
- My Own Mistake: I closed three bedroom vents upstairs one summer to force cool air downstairs. Instead of saving power, my blower motor overheated and cracked a duct seal in my hot attic, raising my monthly power bill by 35 USD. Keep all supply vents open for smooth, balanced airflow.
Balancing Air Distribution with Manual Duct Dampers
Many homes have hot upstairs bedrooms and freezing ground-floor living rooms due to uneven air resistance in long duct runs. You can solve this balance problem by adjusting manual balancing dampers located inside your main supply trunks.
Look for small metal handles along the sides of your round metal supply branch pipes in the basement or attic. When the handle sits parallel with the pipe, the damper inside is wide open.
In hot weather, turn the basement and lower-level dampers slightly sideways to restrict airflow to ground rooms. This forces a larger volume of chilled air upward toward second-story bedrooms where heat naturally rises and collects.
During colder months, reverse this process to direct more warm air to the lower floors where cold drafts settle. Simple manual adjustments balance home comfort without requiring expensive motorized zone boards or secondary compressors.
Managing Indoor Humidity and Coil Freeze Protection
Air conditioners are designed to cool your home and remove moisture from the air at the same time. When humidity levels stay above fifty-five percent indoors, the air feels muggy and heavy, tempting you to lower the thermostat even more.
Lowering thermostat setpoints too far forces your system into excessively long cycles that push the indoor coil below thirty-two degrees Fahrenheit. When moisture freezes onto the coil fins, airflow stops completely, causing liquid refrigerant to flood back into the compressor.
According to indoor air quality research published by the U.S. Environmental Protection Agency (EPA), maintaining your indoor relative humidity between thirty and fifty percent protects building materials, prevents dust mite infestations, and stops toxic mold reproduction in its tracks.
Use the automatic fan setting on your thermostat rather than the continuous "ON" position during humid months. Running the fan continuously blows moisture sitting on the wet evaporator coil straight back into your rooms before it drains away.
Check that your condensate drain pan has a working secondary safety float switch wired directly to the low-voltage circuit. If the primary drain pipe clogs, the float switch cuts power to the equipment immediately, saving your ceilings from expensive water leaks.
Deep Cleaning the Blower Wheel Assembly
While many homeowners remember to swap filters, almost nobody thinks about the curved blades inside the indoor blower fan wheel. Over five to ten years of operation, sticky dust bypasses basic filters and packs tightly into the curved squirrel-cage fan fins.
A buildup of just one-sixteenth of an inch of dirt along the blower blades can reduce total airflow volume by up to twenty percent. This drop in airflow starves the heat exchanger during winter and chokes the cooling coil during summer.
Cleaning the blower wheel requires turning off the furnace breaker, disconnecting the motor wiring harness, and sliding out the entire blower housing. Use an old toothbrush and a shop vacuum to clean out every individual curved blade on the metal wheel.
Wipe down the interior sheet metal walls of the blower cabinet to remove loose debris before reinstalling the assembly. A clean blower wheel spins freely, runs quietly, and delivers the full cubic feet per minute of airflow your system needs.
 Maintaining Gas Furnace Burners and Flame Sensors
If your heating setup relies on natural gas or propane, keeping the burner assembly clean ensures safe, complete combustion. Dirty burners produce yellow, unsteady flames that waste fuel and create dangerous soot buildup inside the heat exchanger tubes.
Inspect the burner flame through the viewing port while the furnace is running. A healthy gas flame should burn with a sharp, steady blue cone; large lazy yellow flames indicate dirty burner ports or incomplete air mixing.
The flame sensor is a thin metal rod that sits directly in the path of the burner flame. Over time, microscopic oxidation forms a non-conductive glass-like coating over the sensor rod.
When the sensor cannot detect the electrical micro-current carried by the flame, the furnace board shuts off gas delivery within seconds for safety. This safety shutdown leaves you without heat even though the burners ignite perfectly for three to five seconds.
You can restore a dirty flame sensor in five minutes by removing one screw and gently rubbing the metal rod with fine steel wool. Never use sandpaper to clean a flame sensor, as sandpaper leaves behind silica residue that melts into an insulating barrier.
Costly Pitfalls That Cut Equipment Life in Half
Neglecting Professional Safety and Refrigerant Inspections
One of the most dangerous mistakes is assuming that if air comes out of the vents, everything inside the equipment is working perfectly. Many mechanical failures develop silently over months before causing a sudden breakdown.
Refrigerant leaks are a prime example of silent system damage. Air conditioners do not consume refrigerant like a car consumes fuel; the refrigerant operates inside a permanently sealed copper loop.
When a small pinhole leak forms along a copper joint, the compressor runs with insufficient cooling lubricant. Operating a system with low refrigerant causes the compressor motor to overheat, resulting in mechanical seizure that costs between 1,500 and 3,000 USD to fix.
Only certified technicians with specialized manifold gauges and digital leak detectors can safely measure superheat, subcooling, and correct operating pressures. You can explore standard maintenance protocols established by the Air Conditioning Contractors of America (ACCA) to see what a professional certified inspection covers.
Gas furnaces carry even higher risks when neglected, including cracked heat exchangers that leak invisible, odorless carbon monoxide into supply ducts. An annual professional check ensures that combustion chambers remain intact and safety switches function properly.
Using Overly Restrictive Air Filters Without Proper Duct Sizing
Many homeowners buy the thickest, highest-rated allergen filters available at retail stores, believing they are helping their family breathe better air. While these filters capture tiny particles, they also present enormous physical resistance to air movement.
I used to buy those expensive, super-thick medical allergen filters thinking I was doing my family a favor. But here is the truth: standard residential blowers are not built to suck air through what is basically a solid brick. That thick filter starved my blower motor of air, making it run scorching hot until the capacitor failed. Save your money and stick to a standard MERV 8 pleated filter unless your system has a dedicated 4-inch deep media cabinet.
Leaving the Outdoor Unit Exposed to Destructive Yard Hazards
Your outdoor condenser unit faces constant threats from everyday yard maintenance. Weed trimmers, lawnmower discharge chutes, and dog urine cause thousands of dollars in avoidable damage each year.
Lawnmower blades spinning near an outdoor unit can fling rocks and hard debris straight through the protective grille, puncturing delicate copper tubing. Always point your lawnmower discharge chute away from the outdoor unit when cutting grass nearby.
Weed trimmer strings easily slice through low-voltage thermostat control wires running from the house into the outdoor unit. Protect exposed wires by enclosing them inside tough plastic conduit piping near ground level.
Keep male dogs away from outdoor units, as acidic pet urine quickly corrodes aluminum fins and eats through copper tubing coils. Once aluminum fins dissolve from acid exposure, that section of the coil can no longer shed heat, permanently reducing cooling capacity.
Ignoring Strange Sounds and Unusual Smells
Heating and cooling systems communicate their mechanical health through sound and smell long before they stop running. Ignoring subtle warning signs allows small, fixable issues to cascade into catastrophic failures.
A high-pitched squealing sound during startup usually points to a slipping fan belt or worn motor bearings that need immediate attention. Letting the bearing run dry will eventually lock the shaft, causing the motor to draw locked-rotor amperage that trips breakers and damages wiring.
A bubbling or hissing sound near the indoor unit suggests refrigerant escaping through a ruptured copper joint under high pressure. Running the system while hearing hissing will empty the refrigerant charge completely and introduce moisture into the lines.
If you smell a persistent electrical burning odor, shut down the main power disconnect immediately. This smell indicates overheated wire insulation, failing circuit boards, or a blower motor running hot due to an electrical short.
Sweet, musty odors coming from supply vents usually indicate stagnant water sitting inside the drain pan or microbial growth within the duct insulation. Addressing these smells early protects your indoor air quality and stops mold from spreading through your living areas.
Frequently Asked Questions About HVAC Maintenance
How often should I really change my home air filter?
Check your air filter once every 30 days. If you have indoor pets or live in a dusty area, standard 1-inch pleated filters need replacement every 30 to 60 days. Deep 4-inch to 5-inch media filters can last between 6 and 9 months before needing a swap.
Can I clean my outdoor AC condenser unit with a regular garden hose?
Yes, using a garden hose with a gentle spray nozzle is the safest way to rinse out dirt, dust, and grass clippings from your condenser fins. Never use a high-pressure pressure washer, because intense water pressure will bend the aluminum fins and permanently block airflow.
What is a normal AC temperature split (Delta-T)?
A healthy cooling system should produce a temperature difference of 16°F to 20°F between the return air grille and the closest supply register. If the difference is below 14°F, you likely have dirty coils or a refrigerant leak.
Why does my AC condensate drain line keep clogging with slime?
Dark, warm PVC drain lines are ideal breeding grounds for algae and bacterial slime. Pouring one cup of distilled white vinegar down the drain access T-pipe once a month during summer breaks down buildup and keeps the line running clean.
Is an annual professional HVAC tune-up really necessary?
Yes. While homeowners can easily handle filter swaps and fin washdowns, certified technicians test electrical capacitor tolerances, inspect furnace heat exchangers for deadly carbon monoxide cracks, and safely check refrigerant pressures with digital gauges.
Your Long-Term Action Plan for Stress-Free Home Comfort
Taking care of your heating and cooling equipment does not require advanced technical training or hundreds of hours of manual labor. It simply takes a handful of consistent, mindful habits performed throughout the changing seasons.
By swapping air filters regularly, clearing leaves from your outdoor condenser, flushing drain lines, and scheduling professional inspections, you protect your bank account from sudden emergencies. You also enjoy consistent room temperatures, cleaner indoor air, and much lower monthly utility bills.
Treat your heating and cooling setup like the valuable asset it is, and it will reward you with reliable performance through the hottest summers and coldest winters.
I spent years ignoring my heating and cooling equipment until that expensive summer breakdown taught me a lesson I will never forget. Once I started spending just fifteen minutes every month on basic filter changes and coil cleanings, my summer power bills dropped by twenty percent and my system has run without a single hiccup.
I want you to experience that same peace of mind and avoid the financial headache of unexpected repair bills. Grab a fresh filter, take a quick walk around your outdoor unit today, and take control of your home comfort.
Home Maintenance & Safety Disclaimer
The heating, ventilation, and air conditioning maintenance advice provided in this guide is intended strictly for general educational and informational purposes. Always turn off main electrical power and fuel supply valves before inspecting or cleaning any mechanical equipment. Complex electrical diagnostics, refrigerant handling, and gas line repairs should only be performed by licensed, certified HVAC professionals in accordance with local building codes and safety regulations.