The Blurry Prison of Low-Resolution AI Generations
You sit down at your computer, write an incredibly detailed prompt, and wait with intense excitement as the generator loads your image. The finished artwork is a stunning masterpiece with beautiful lighting, rich colors, and a perfect composition.
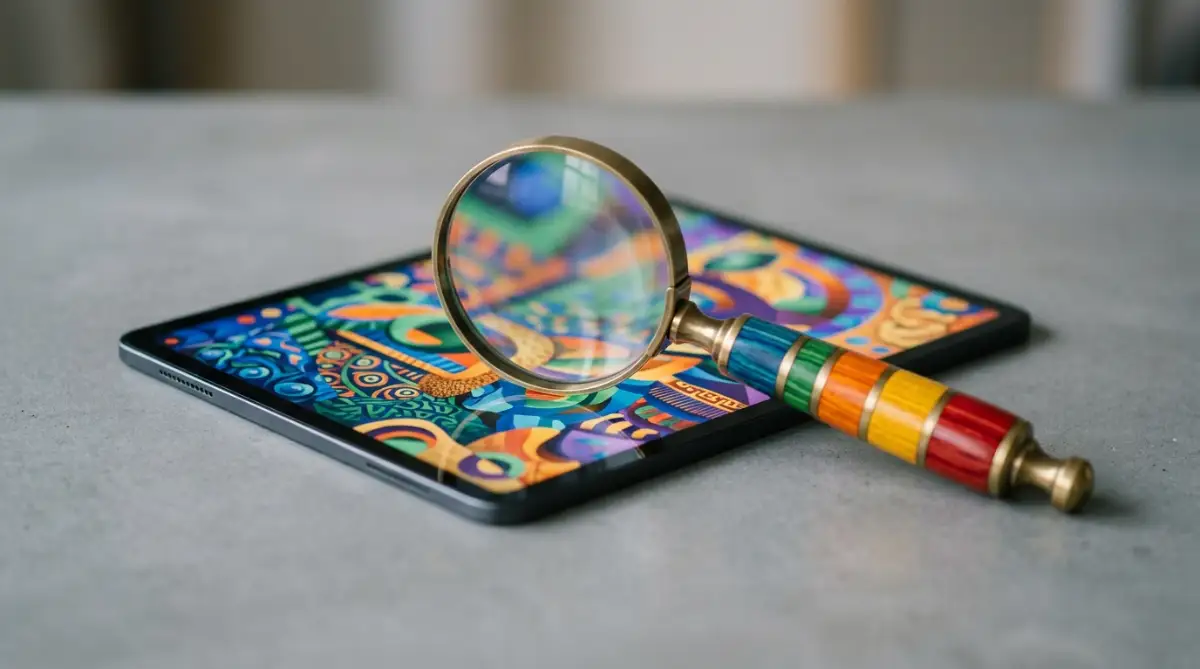
Your heart immediately sinks when you try to print it as a poster or upload it to your website as a background banner. Zooming in reveals that the file is only a tiny 512x512 pixels, full of blurry lines, muddy textures, and blocky pixel blocks.
Your beautiful creative vision is trapped inside a low-resolution prison, making the entire image look cheap, amateurish, and completely useless for real-world projects. You feel defeated and frustrated, wondering why modern computer systems struggle to deliver sharp, high-quality files from the start.
Why Traditional Image Resizing Fails to Protect Quality
When desperate creators try to make their AI images larger, they often rely on incorrect methods that make the blurriness worse. Rushing to use standard editing tricks without understanding neural network upscaling leads to muddy results and loss of detail.
Here is why traditional photo resizing methods usually fail:
- Using standard bicubic interpolation in Photoshop: This simple method stretches the existing pixels, which makes your image look incredibly soft, blurry, and fuzzy.
- Relying on low-quality, ad-filled web upscalers: Many free websites use cheap filters that add weird artificial noise and artifacts to your clean designs.
- Expecting a basic photo enhancer to understand AI textures: Standard enhancers do not know how to handle the unique, dreamlike textures of generative art.
- Scaling your images up too far in a single step: Trying to force a small thumbnail into an 8K poster in one go ruins the natural details of the subject.
- Ignoring the difference between stretching and reconstructing: Failing to realize that your brain needs new pixels, not just stretched ones, keeps your art blurry.
How Blurry Images Drain Your Creative Confidence
Living with low-resolution files does more than just ruin your digital prints; it impacts your professional confidence and your passion for creating.
- Anxiety when presenting your portfolio to clients: You worry that professional art buyers will reject your designs because they look pixelated on large screens.
- A feeling of wasting your precious creative energy: Knowing that your beautiful ideas cannot be printed as physical posters drains your motivation to keep generating.
- Embarrassment when sharing your artwork on social media: You feel self-conscious when users zoom in on your posts and notice muddy, distorted details.
- The feeling of being locked out of the premium art market: Watching other creators sell massive, sharp canvas prints makes you feel like you lack the technical skills to succeed.
Fortunately, you do not need to buy expensive commercial software or have a degree in computer engineering to solve this issue. By using free, open-source AI upscalers and understanding a few simple parameter settings, you can reconstruct missing pixels and enjoy razor-sharp images today.
The Scientific Blueprint of AI Image Reconstruction
To make a small image larger without losing quality, you must realize that traditional software cannot create new information. If you try to stretch a small picture manually, the software has to guess how to fill the gaps, which always results in a blurry mess.
Think of traditional image resizing like stretching a small piece of blue bubblegum.
If you stretch it, it gets thin, pale, and translucent.
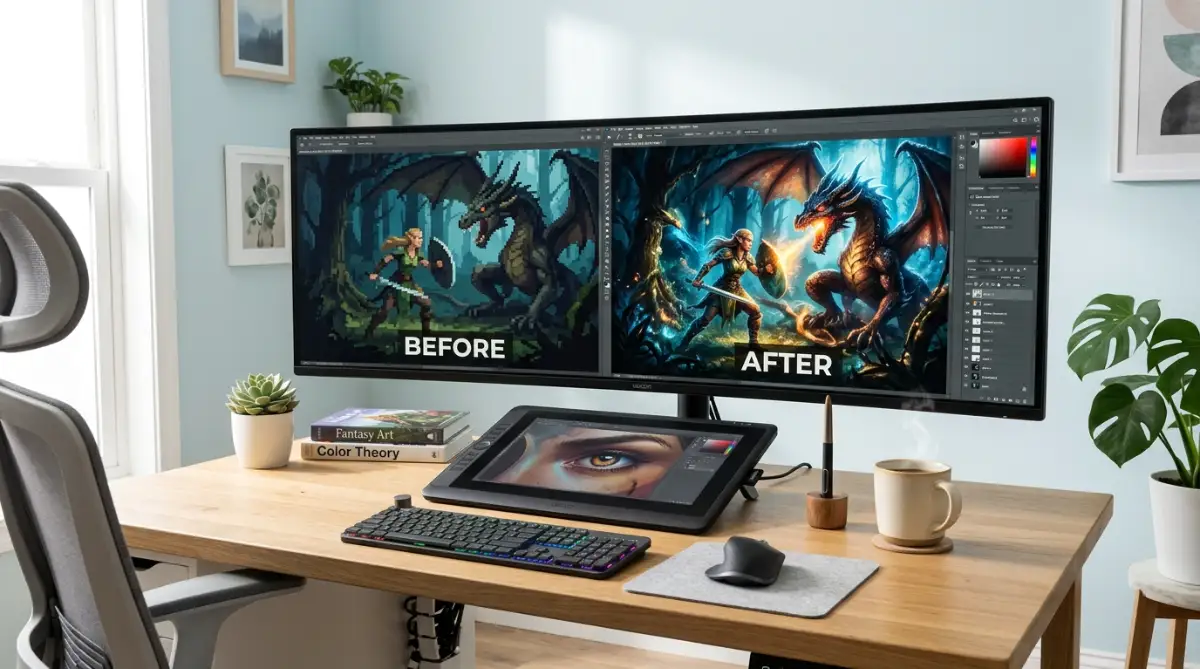
AI upscaling does not stretch your original pixels; it uses a trained neural network to act as a master painter, painting fresh, highly detailed layers directly onto your canvas to fill the gaps naturally.
We will show you the first three essential steps to master this neural network upscaling process safely at home.
Step 1: Understanding AI Super-Resolution vs. Traditional Interpolation
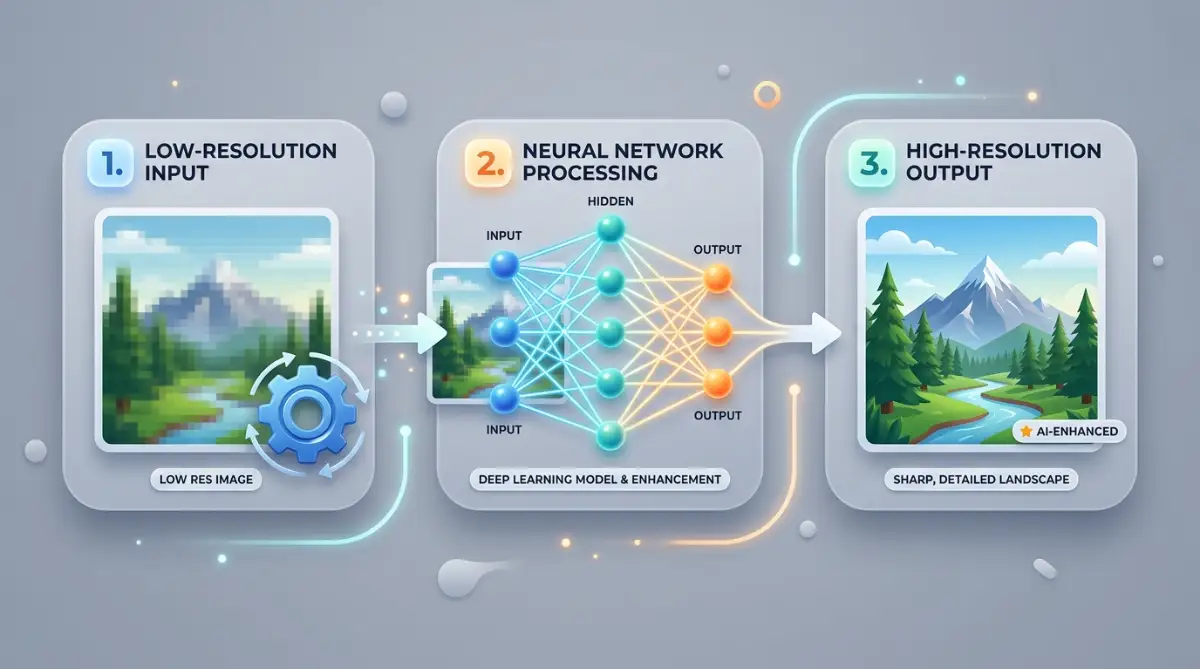
The first step to sharp images is understanding the science behind how computers reconstruct visual details. This method relies on a powerful technology called AI Super-Resolution (often driven by models like Real-ESRGAN).
The Science of Neural Network Reconstruction
Traditional resizing programs look at two adjacent pixels and guess the color of the empty space between them by averaging the values.
AI Super-Resolution models use a deep neural network that has studied millions of high-resolution reference images.
The system is actually reconstructing the image based on its deep understanding of real-world textures.
The Detective Analogy of Pixels
To understand this, imagine showing a blurry photograph of a face to a human detective.
The detective can easily recognize the shapes of eyes, lips, and hair because they have seen thousands of human faces in their life.
The detective can then draw a highly detailed portrait of that person, which is exactly how Real-ESRGAN operates.
It recognizes a blurry patch as "grass texture" or "leather jacket fabric" and replaces it with a clean, sharp, and highly realistic version.
This scientific reconstruction is what keeps your upscaled images looking natural, crisp, and beautifully detailed instead of stretched and fuzzy.
Step 2: Selecting and Using Free Open-Source Upscaling Tools
You do not need to spend hundreds of dollars on commercial software to get professional-grade upscaling results.
Some of the absolute best upscaling tools in the creative world are completely free and open-source.
Sourcing Your Free Software
The most popular and beginner-friendly desktop application for this task is Upscayl.
Upscayl is a completely free, open-source program that runs directly on your Windows, Mac, or Linux computer without needing an internet connection.
This local processing ensures your personal artwork remains completely private on your own hard drive.
Running Your First Local Upscale
Open the Upscayl application and locate the image selection box on the left side of the dashboard.
Click to select your low-resolution AI generation from your computer folders.
Under the model selection menu, choose "Real-ESRGAN (General Photo)" for standard digital art.
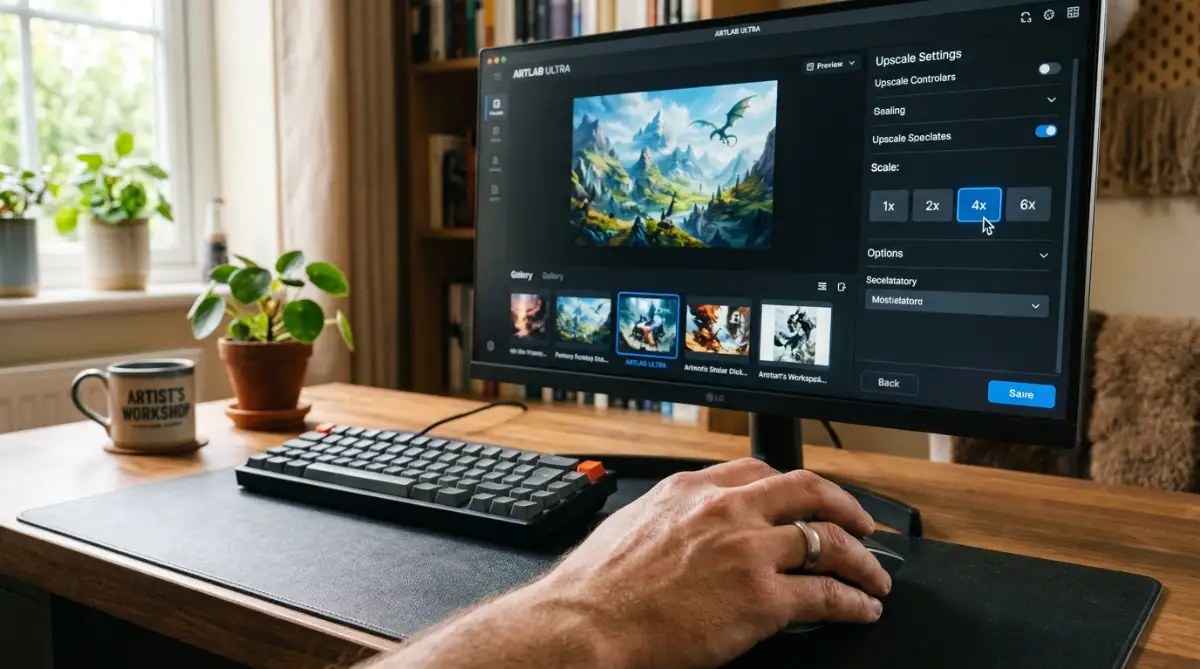
Click the "Upscayl" button at the bottom of the dashboard and watch as the progress bar moves across your screen.
The software will use your computer's graphics card to reconstruct the image, saving a beautiful, razor-sharp 4x larger version in your output folder within seconds.
Step 3: Mastering Noise Reduction and Scale Parameters
To get the most natural results from your upscaler, you must configure your settings to match your specific image style.
If you use the wrong parameters, you can easily end up with a weird, plastic look on your characters' faces.
The Dangers of the "Plastic Skin" Effect
When an AI upscaler processes a human portrait, it tries to remove any pixel noise and smooth out the gradients.
If you apply too much noise reduction, the software will erase the natural skin pores, tiny hair strands, and fabric textures.
This aggressive smoothing leaves your subject looking like a shiny, artificial plastic doll instead of a lifelike human.
Finding the Perfect Settings Balance
- For Digital Paintings and Anime Art: Use the "Digital Art" or "Anime" model settings in Upscayl, which are designed to keep flat colors and clean lines sharp.
- For Photographic Portraits: Use the standard "Real-ESRGAN" model with a low noise reduction setting of 1 or 2 to preserve natural skin textures.
- For Scenic Landscapes: Use a high-definition upscaling model to sharpen distant trees, rocky mountains, and water reflections beautifully.
By implementing these three essential steps, you are successfully taking control of your digital image tools. Your understanding of neural network reconstruction, open-source software, and parameter settings will help you upscale your AI art with complete confidence, keeping your finished files clean, sharp, and ready for any print project.
Step 4: Using the Outpainting Technique to Expand Borders
Sometimes, you upscale an image perfectly, but you realize later that you need more background space around your subject to fit a wide website banner.
You do not need to stretch the image manually; you can use an advanced AI technique called outpainting.
Outpainting allows your generator to look at your existing upscaled image and paint matching new scenery around the borders.
How to Outpaint Safely
Load your upscaled image into an AI editor like Stable Diffusion or Midjourney's panning interface.
Select the direction you want to expand (such as left or right) and write a simple prompt describing the background scenery.
The AI will read the lighting, colors, and textures of your original art, seamlessly painting matching new pixels to extend your canvas without any loss of quality.
Step 5: Batch Processing Your Generations to Save Time
If you have a large folder of low-resolution images from a weekend design session, upscaling them one-by-one is highly inefficient.
You do not want to spend your evening waiting for single progress bars to complete.
Instead, use the batch processing feature inside Upscayl to enhance your entire library in a single session.
How to Run a Batch Session
Organize all the low-resolution images you want to enhance into a single folder on your desktop.
Open Upscayl, toggle the "Batch Upscayl" switch on the dashboard, and select your input folder.
Set your target output folder, select your favorite Real-ESRGAN model, and click start.
The software will work quietly in the background, automatically processing every single image in the folder while you enjoy a warm cup of coffee.
Critical Mistakes to Avoid on Your AI Upscaling Journey
Enhancing your digital art is a simple process of setting parameters, but it is very easy to make mistakes if you do not understand the software.
Knowing what not to do is just as important as knowing the right upscaling steps.
Avoid these five common errors to keep your digital creations clean, sharp, and professional.
1. Scaling Your Images Directly in Photo Editors
One of the most common mistakes is opening your low-resolution AI art in Photoshop or GIMP and changing the image size manually.
As mentioned earlier, these programs simply stretch the existing pixels, leaving you with blurry lines and muddy textures.
Always use a dedicated neural upscaler like Upscayl or Real-ESRGAN to process your AI art first.
This ensures your files are reconstructed with fresh, sharp details before you perform any final color edits.
2. Over-Smoothing Skin Textures on Human Portraits
Another common error is applying heavy noise reduction and face restoration filters to every portrait project.
This aggressive processing erases the natural, lifelike details of your subject, leaving them looking like artificial wax figures.
Always keep your noise reduction settings low when enhancing realistic human faces.
Preserving a little natural grain and skin texture is what actually makes your digital portraits look believable and high-end.
3. Using the Wrong Model for Stylized Art and Anime
If you try to upscale a clean, flat anime illustration using a realistic photo model, the software will get confused.
It will try to add realistic skin pores, hair strands, and fabric textures to your simple cartoon lines, resulting in a weird, messy look.
Always select the dedicated "Digital Art" or "Anime" model settings when upscaling stylized designs.
These specialized models are designed to keep flat colors uniform and sharp, protecting your original art style perfectly.
4. Relying on High-Scale Settings (8x or More) on Weak Computers
Many beginners immediately select the maximum upscaling factor (8x or 16x) in their software, hoping for massive resolutions.
However, scaling a small image by eight times requires an immense amount of computer processing power.
If your desktop computer does not have a powerful graphics card, trying to run a high-scale upscale can freeze your system or crash the software.
Always stick to a standard 4x upscaling factor, which delivers plenty of resolution for sharp poster printing without overloading your computer.
5. Feeling Discouraged by Minor Artifacts or Noise
It is completely natural for your upscaled images to feature minor visual mistakes, like weird textures in the background or slight noise in the corners.
Do not let these small errors make you feel like your creative project is a complete failure.
Use simple digital editing tools like the spot healing brush in Photoshop to gently clean up the specific flawed areas.
This combination of AI reconstruction and human touch-up is the absolute key to creating flawless, gallery-grade digital masterpieces.
Embracing the Future of High-Resolution AI Art
Embracing neural network upscalers as a key part of your creative toolkit is one of the most exciting and rewarding steps you can take.
It does not require expensive commercial software, advanced coding skills, or a massive budget to achieve success.
By selecting the right open-source tools, understanding Real-ESRGAN models, and mastering scale parameters, you can enhance anything.
You will feel a wonderful sense of joy and relief every time you watch a blurry, pixelated draft resolve into a sharp, beautiful masterpiece.
Download your free upscaling tools, start your first batch processing session today, and enjoy the wonderful freedom of limitless, high-resolution digital creativity!