How to Patch a Hole in Drywall and Paint Over It So No One Notices
That hole in your wall has probably been bothering you for weeks.
Maybe it happened when you moved a dresser too fast. Maybe a doorknob finally won the fight against the wall behind it. Either way, every time you walk past it, you notice it. Guests notice it too, even when they're too polite to say anything.
Here's the good news. This is one of the easiest home repairs to do yourself, and you don't need any special training to get a result that looks professional.
Why This Small Hole Feels Like Such a Big Problem
A tiny hole shouldn't feel like a big deal. But it often does, and there are real reasons for that.
- You don't know if you're using the right product (spackle, joint compound, or filler?)
- You're worried about making the hole bigger instead of fixing it
- You've seen botched patch jobs that look worse than the original hole
- You're not sure how paint will match after the repair dries
This uncertainty is exactly why so many holes sit unfixed for months. People either avoid the project entirely or rush it without the right steps, which usually leaves a noticeable bump, a dent, or a paint mismatch that's almost more annoying than the hole itself.
There's also a quieter cost to this. A wall with a visible flaw can make a whole room feel less cared for, even if everything else is clean and organized. It's a small thing, but it sits in the back of your mind. Fixing it properly does more for how a room feels than people expect.
The fix isn't complicated. It just needs to be done in the right order, with the right materials, and with a little patience between steps. Let's go through it.
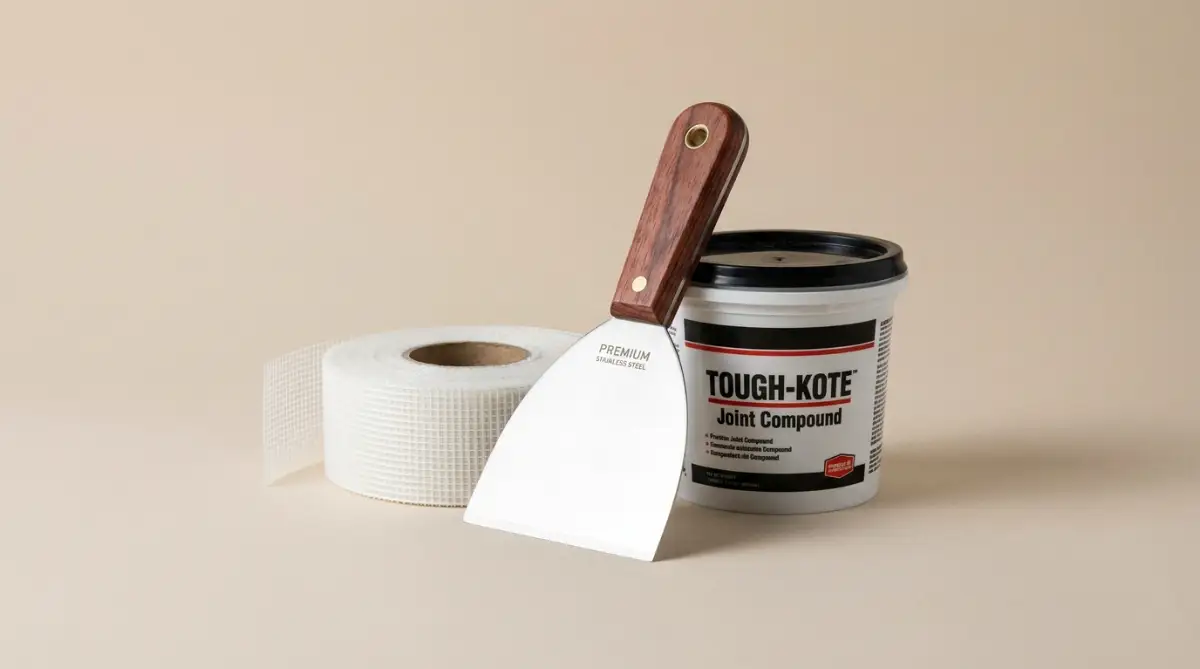
What You'll Need Before You Start
Before touching the wall, gather these basics:
- Spackle or lightweight joint compound (spackle works great for small holes; joint compound is better for anything bigger than a golf ball)
- A putty knife (a 3-inch and a 6-inch one if you have both)
- Fine-grit sandpaper (220 grit is ideal)
- A damp cloth
- Primer
- Matching paint
- A self-adhesive mesh patch (only needed for holes larger than about 2 inches)
You don't need fancy tools here. Most of this is available at any hardware store for under a few dollars total.
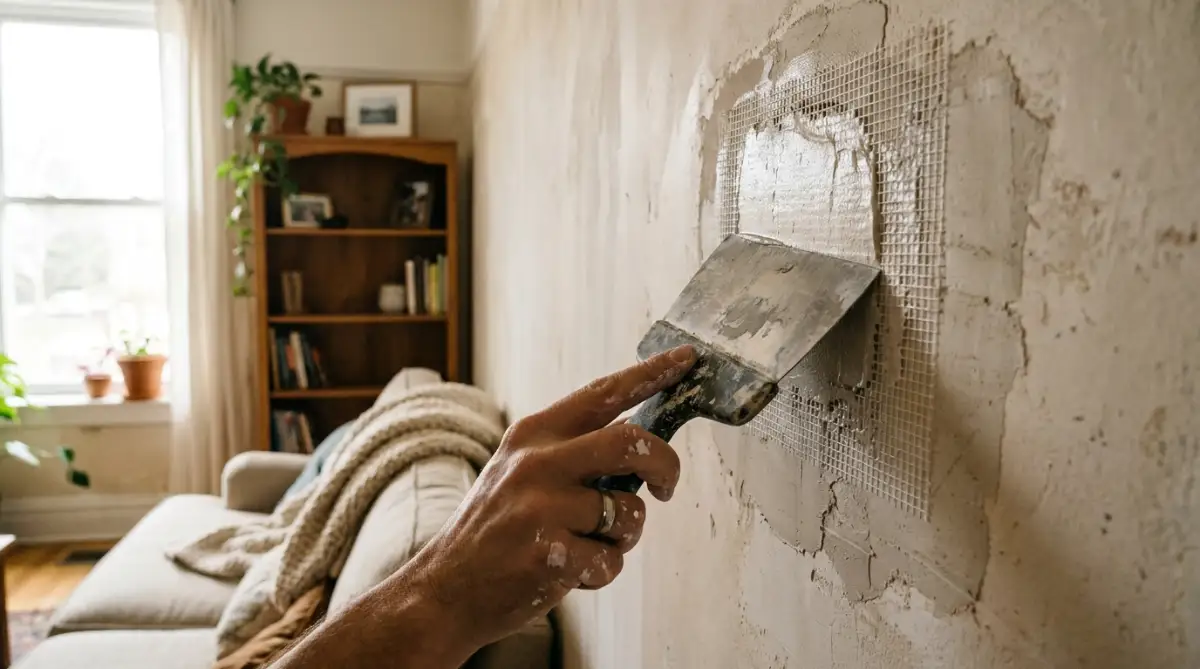
Step 1: Clean Up the Hole Before You Fill Anything
This step gets skipped constantly, and it's the reason a lot of patch jobs fail.
Brush away loose drywall dust and any crumbling edges. If there are jagged bits sticking out, gently push them in or trim them with a utility knife.
For small nail holes, this takes ten seconds. For bigger holes, you want a clean, stable edge before you add any filler. Think of it like cleaning a cut before putting on a bandage — the filler will hold better if it has a solid surface to grip.
For holes larger than two inches, place a self-adhesive mesh patch over the gap first. This gives the compound something to bond to instead of just hanging in open air.
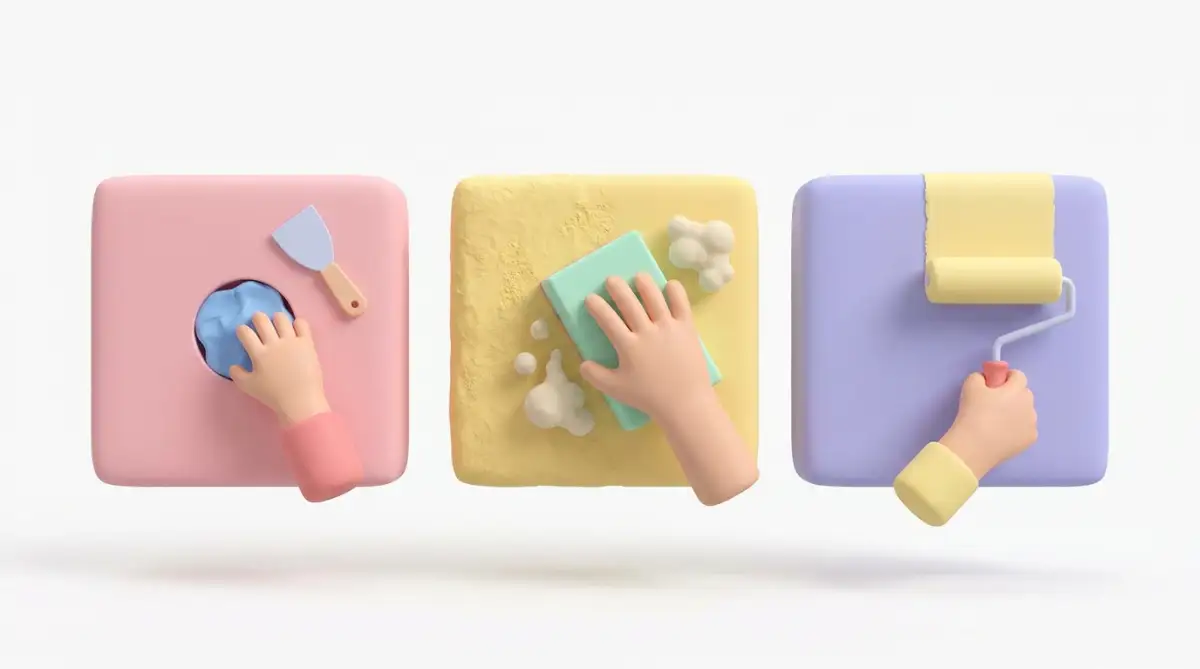
Step 2: Apply the Compound in Thin Layers
Here's where most people go wrong: they pile on too much filler at once.
Use your putty knife to apply a thin layer of spackle or joint compound over the hole. Press it in firmly, then drag the knife across the surface at an angle to smooth it out.
Let it dry completely. This usually takes a few hours depending on humidity and how thick the layer is.
Once it's dry, check the surface. If you can still see a slight dip, that's normal. Apply a second thin coat, slightly wider than the first, feathering the edges out so there's no hard line where old wall meets new compound.
A small scenario to picture: if you fill the hole with one thick blob, it will likely crack as it dries, and you'll be back to square one. Thin layers, applied patiently, are what actually hold up over time.
Step 3: Sand It Down Until It's Invisible by Touch
Once the final layer is fully dry, grab your sandpaper.
Sand in gentle, circular motions until the patch is flush with the rest of the wall. Run your hand over it with your eyes closed — if you can feel a bump or dip, keep sanding.
This step matters more than people expect. Paint doesn't hide texture. It actually makes uneven texture more visible, especially under lamp light or sunlight hitting the wall at an angle.
Wipe the area down with a slightly damp cloth afterward to remove dust before you prime.
Why Primer Is the Step You Shouldn't Skip
A lot of people jump straight from sanding to painting. Don't do this.
Drywall compound absorbs paint differently than the painted wall around it. Skip primer, and you'll likely end up with a slightly duller or shinier patch even after a perfect paint match — a problem painters call "flashing."
Apply one thin coat of primer over the patched area only, let it dry fully, and then move to your topcoat.
Painting Over the Patch So It Blends In
This final step is where the whole repair either disappears or gives itself away.
- Use the same paint from the original can if you have it; paint fades over time, so a brand-new can of the "same" color might not match a wall painted two years ago
- Feather the edges of your paint stroke outward rather than stopping at a hard line around the patch
- Use a small roller instead of a brush for a texture that matches the rest of the wall
- Apply two thin coats rather than one thick one
If you don't have leftover paint, many hardware stores can color-match from a small chip of dried paint or even an old paint can lid.
A Few Things That Make This Repair Last
- Avoid hanging anything heavy on the patched spot for at least a week
- Keep the area dry while the compound cures
- If the wall has texture (like an orange-peel or popcorn finish), ask your hardware store about texture spray to match it before painting
You've Got This
This repair looks intimidating before you start and surprisingly simple once you're halfway through. The real secret isn't skill. It's patience between coats and not rushing the drying time.
Once that wall is patched, sanded, and painted, you'll walk past it and genuinely have to think hard to remember where the hole used to be. That's the goal, and it's completely within reach with a Saturday afternoon and a few dollars in supplies.
Make the Patch Disappear Forever: Pro-Level Finishing Tricks
You already know how to fill, sand, and paint a hole. Now let's talk about the tricks that separate an "okay" patch from one that's genuinely invisible.
Trick 1: Feather Twice as Wide as You Think You Need To
Most people feather the edge of their joint compound about an inch past the hole. That's not enough.
Go wider. Feather your compound out three to four inches past the edge of the damage on all sides.
Here's the logic behind this. A thick patch with sharp edges catches light differently than the wall around it, even after paint. A wide, gradual feather blends the thickness change so slowly that your eye can't detect where it starts.
Picture running your fingers across a ramp versus a step. A ramp feels smooth. A step feels obvious. You want a ramp, not a step.
Trick 2: Check Your Wall Under a Work Light, Not Just Daylight
Daylight is forgiving. It's soft and comes from everywhere, so small imperfections hide easily.
A cheap work light or even your phone's flashlight held sideways against the wall is brutal. It throws hard shadows across every bump and dip.
Do this before you paint, not after. Hold a light at a low angle next to your dried, sanded patch. If you see shadows or ridges, grab the sandpaper again.
This single habit catches more flaws than anything else on this list. Painters call this "raking light," and it's the same trick used to spot flaws on car bodies before a paint job.
Trick 3: Match Sheen, Not Just Color
This one trips up almost everyone. You can nail the exact paint color and still end up with a visible patch.
Why? Sheen. Flat, eggshell, satin, and semi-gloss all reflect light differently.
If your wall is eggshell and you accidentally grab a satin can, the patch will catch light differently than the wall around it, even with an identical color match. From across the room, it'll look like a faint shadow that never quite goes away.
Check your paint can label or ask the store to scan the sheen along with the color if you're getting a fresh match.
Keeping Your Wall Looking Fresh for the Long Run
A good patch job isn't just about today. It's about making sure you don't have to redo this in six months.
- Touch up nail holes immediately instead of letting them collect, since several small holes are harder to blend than one
- Keep a labeled sample of your wall paint in a small jar so you always have a match ready
- Avoid hanging picture frames in the exact same spot repeatedly, since this weakens the same patch of drywall over time
- Wipe walls gently rather than scrubbing hard around patched areas, since fresh compound can be slightly more porous for the first few weeks
Think of this the same way you'd think about a scar healing. The area is a little more sensitive at first, but it strengthens and blends in completely with normal care over time.
One more thing worth mentioning: temperature and humidity affect drying time more than people expect. A patch that dries in two hours in a dry, warm room might need five or six hours in a humid bathroom or basement. Rushing this step is one of the fastest ways to trap moisture under paint, which can cause bubbling later.
If you're patching a wall in a humid room, consider running a fan nearby or cracking a window. Patience here saves you a repeat job next month.
Five Mistakes That Wreck an Otherwise Good Patch Job
Even careful people fall into these traps. Here's what to watch for.
Mistake 1: Applying One Thick Layer Instead of Several Thin Ones
This is the most common mistake by far. A thick blob of compound looks like it'll save time, but it almost always cracks as it dries.
The fix: thin layers, fully dried between coats, every time.
Mistake 2: Skipping the Primer Step
We covered this in Part 1, but it's worth repeating here as a warning. Skipping primer is the single biggest reason patches show up as a dull or shiny spot after painting.
Five minutes of primer saves you from repainting the whole wall later.
Mistake 3: Painting Before the Compound Is Fully Dry
Compound can look dry on the surface while still holding moisture underneath, especially in thicker spots.
Painting over a patch that isn't fully cured traps that moisture, which can lead to bubbling, peeling, or a slightly soft spot that shows up days later.
If you're not sure, wait an extra few hours. It's better to wait than redo the whole job.
Mistake 4: Using a Brush Instead of a Roller for the Final Coat
Brush strokes leave a different texture pattern than rolled paint. Even with a perfect color and sheen match, brush marks over a patch will catch light differently than the rolled texture on the rest of the wall.
Keep a small foam roller on hand specifically for patch touch-ups.
Mistake 5: Ignoring the Surrounding Texture
If your wall has any texture (orange peel, light stipple, or knockdown), a perfectly smooth patch will stand out no matter how good the paint match is.
Smooth and textured surfaces reflect light completely differently. This is one of the most overlooked reasons a "perfect" patch still looks off from a few feet away.
You Already Have What It Takes to Fix This Right
Here's the truth: this isn't really about drywall. It's about trusting that a slow, careful process beats a fast, sloppy one.
You don't need to be a professional contractor to get a professional result. You just need to follow the order of steps, give each layer time to dry, and check your work under a harsh light before calling it done.
The next time you walk into that room and your eyes go straight to where the hole used to be — and find nothing there — that's the moment this whole guide was for.
Grab your putty knife this weekend. That wall has waited long enough.